We decided that it was time for a game of BattleTech.
With all of the other aspects of the BattleTech hobby available, such as online gaming with MechWarrior Online, miniatures modeling and painting, fiction to read from novels and BattleCorps, and then a host of other distractions like my buddy finally talking me into Diablo III (Crusader class finally sold me on it!), it’s fairly easy to discover that I haven’t played an actual game of BattleTech in about a year.
I’m almost ashamed to admit to it, but I think a lot of you out there are in the same boat.
Well, it was time to rectify the situation. A few minutes of planning and a buddy coming over later, and we had us a game ready to go.
The Forces
We decided on a game ultimately controllable proportions, and it was agreed that I should field my full and recently painted Clan Coyote Star. My opponent decided to take my painted Com Guard Level II, so we could play with all painted minis. The rosters are listed below.
Clan Coyote Star
Savage Coyote C – Gunnery 2/Piloting 2 – 6,254BV2
Timber Wolf E – Gunnery 3/Piloting 3 – 3,813BV2
Septicemia B – Gunnery 3/Piloting 3 – 3,604BV2
Highlander IIC 2 – Gunnery 3/Piloting 3 – 4,568BV2
Guillotine IIC – Gunnery 3/Piloting 3 – 3,708BV2
Clan Coyote Star BV2 Total: 21,947
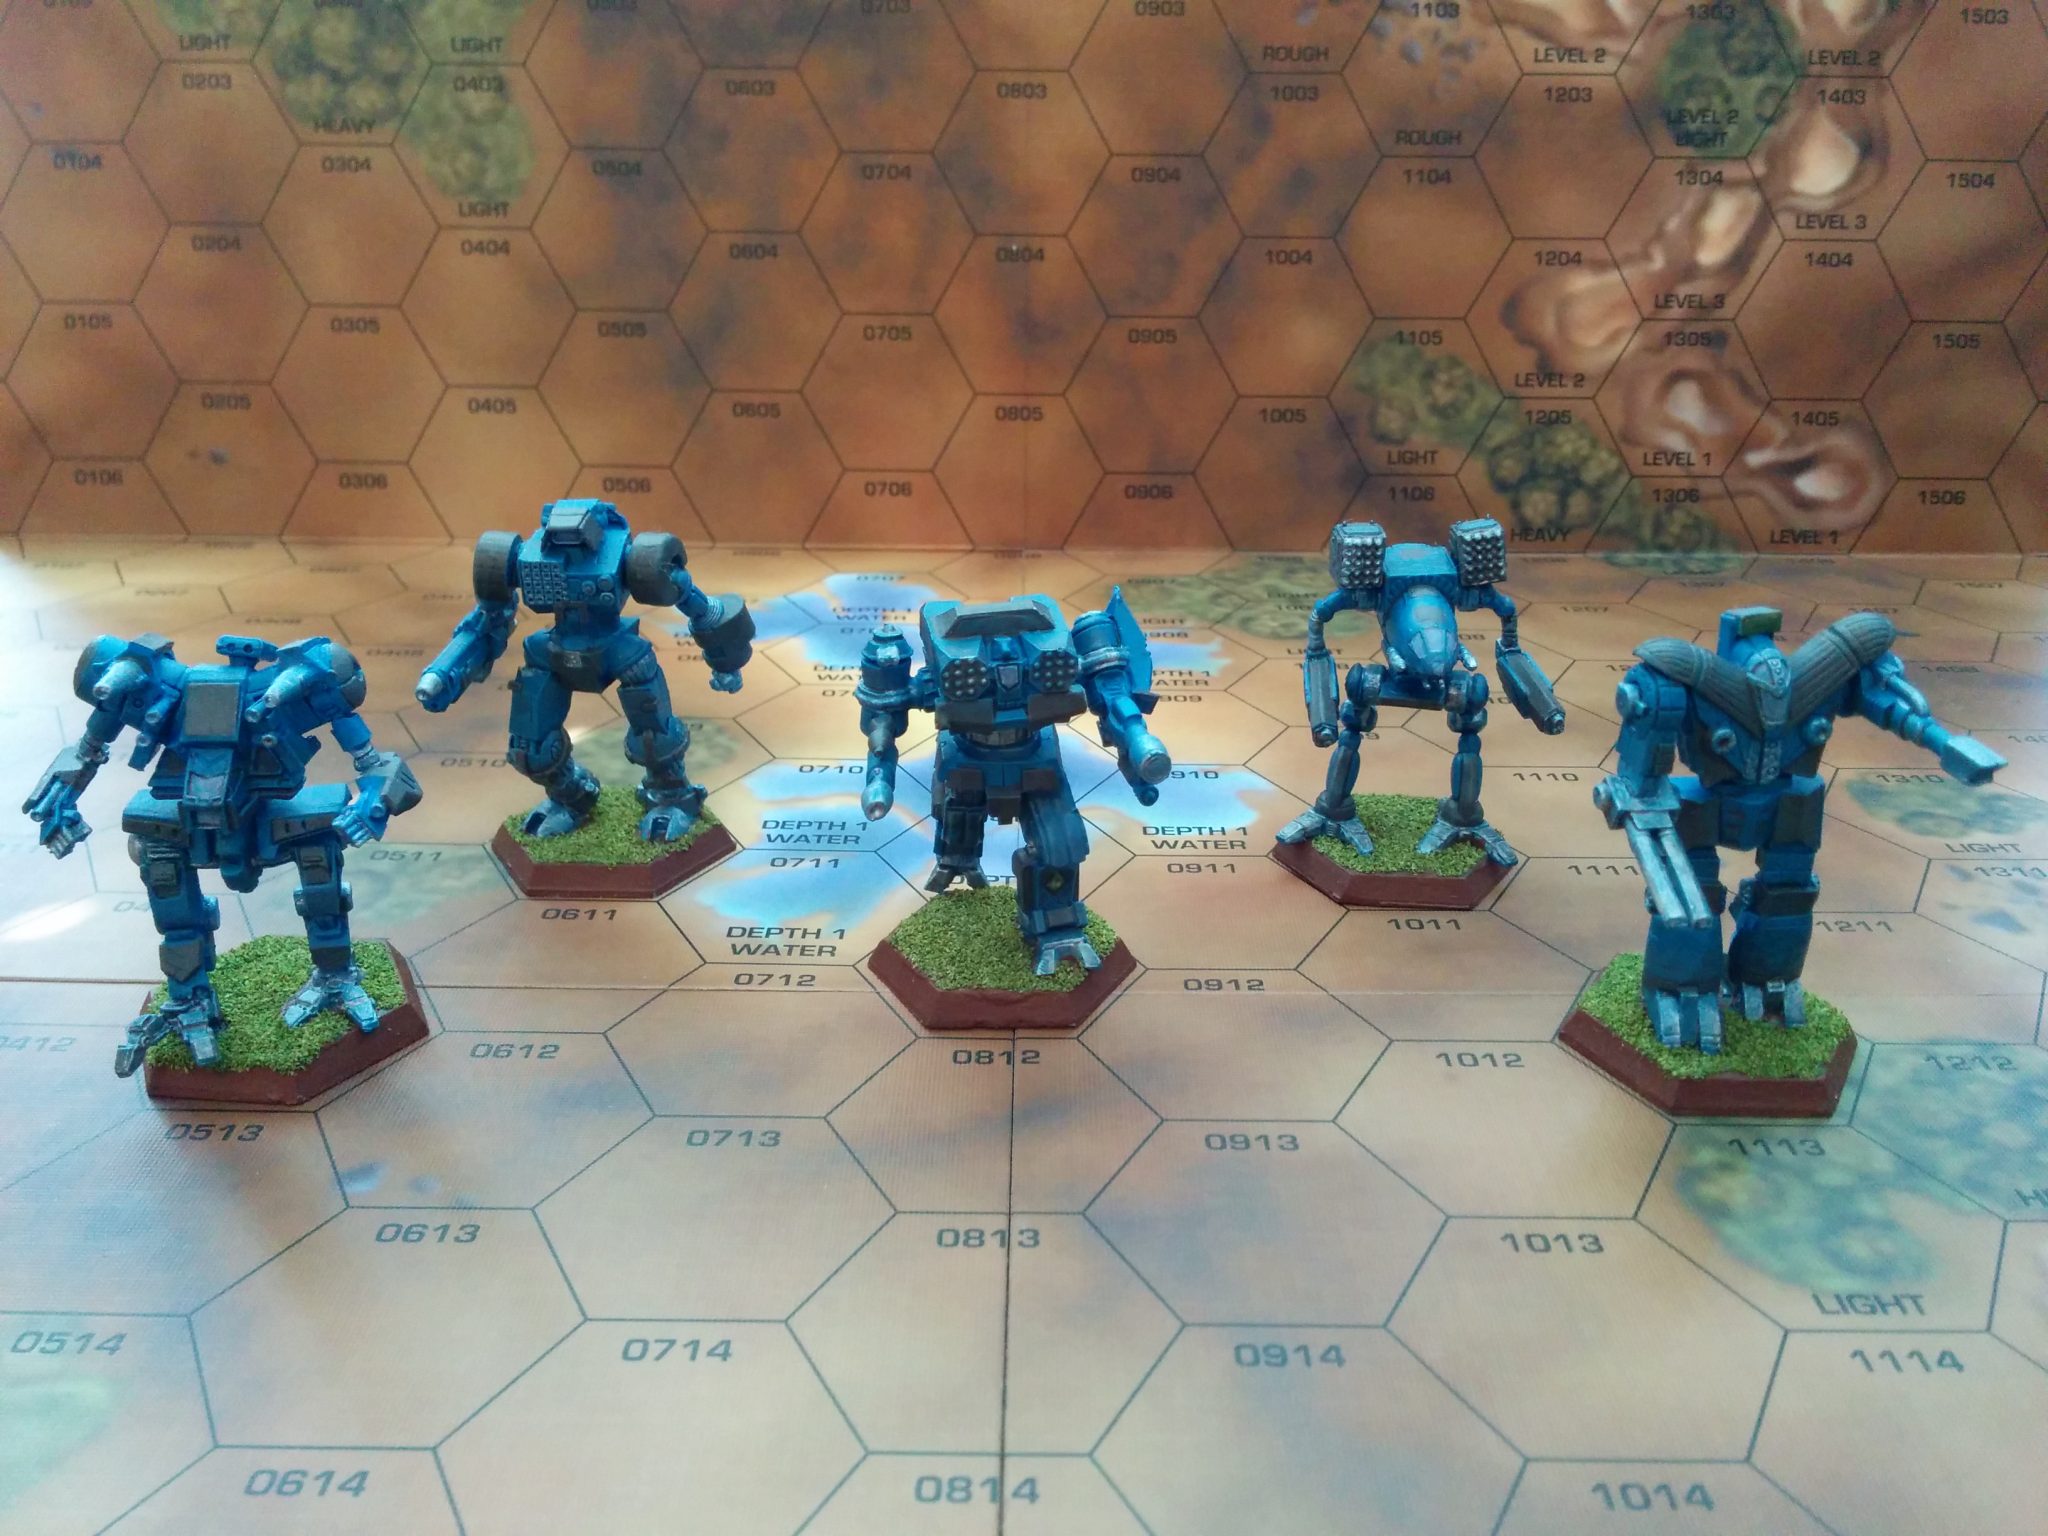
Clan Coyote Star
Since I was getting to use the entire Star, I decided to have some fun and go for as much of a theme as I could. I decided to concentrate on variants that utilize Advanced Tactical Missiles (ATM). The Coyotes developed that tech, and I thought it would be fun to showcase their special toys. The Savage Coyote, Timber Wolf, and Highlander IIC variants all used ATMs in some fashion. I could have also used a Septicemia variant with ATMs, but I liked the Large Pulse Lasers and Targeting Computer combination of the B variant too much to pass it up.
Com Guard Level II
THG-11E Thug – Gunnery 1/Piloting 1 – 3.936BV2
FLS-9M Flashman – Gunnery 1/Piloting 1 – 4,548BV2
GLT-8D Guillotine – Gunnery 1/Piloting 1 – 4,538BV2
BL-12-KNT Black Knight – Gunnery 1/Piloting 1 – 4,416BV2
HER-4S Hermes – Gunnery 1/Piloting 1 – 2,438BV2
MON-76 Mongoose – Gunnery 1/Piloting 1 – 2,146BV2
Com Guard Level II BV2 Total: 22,022
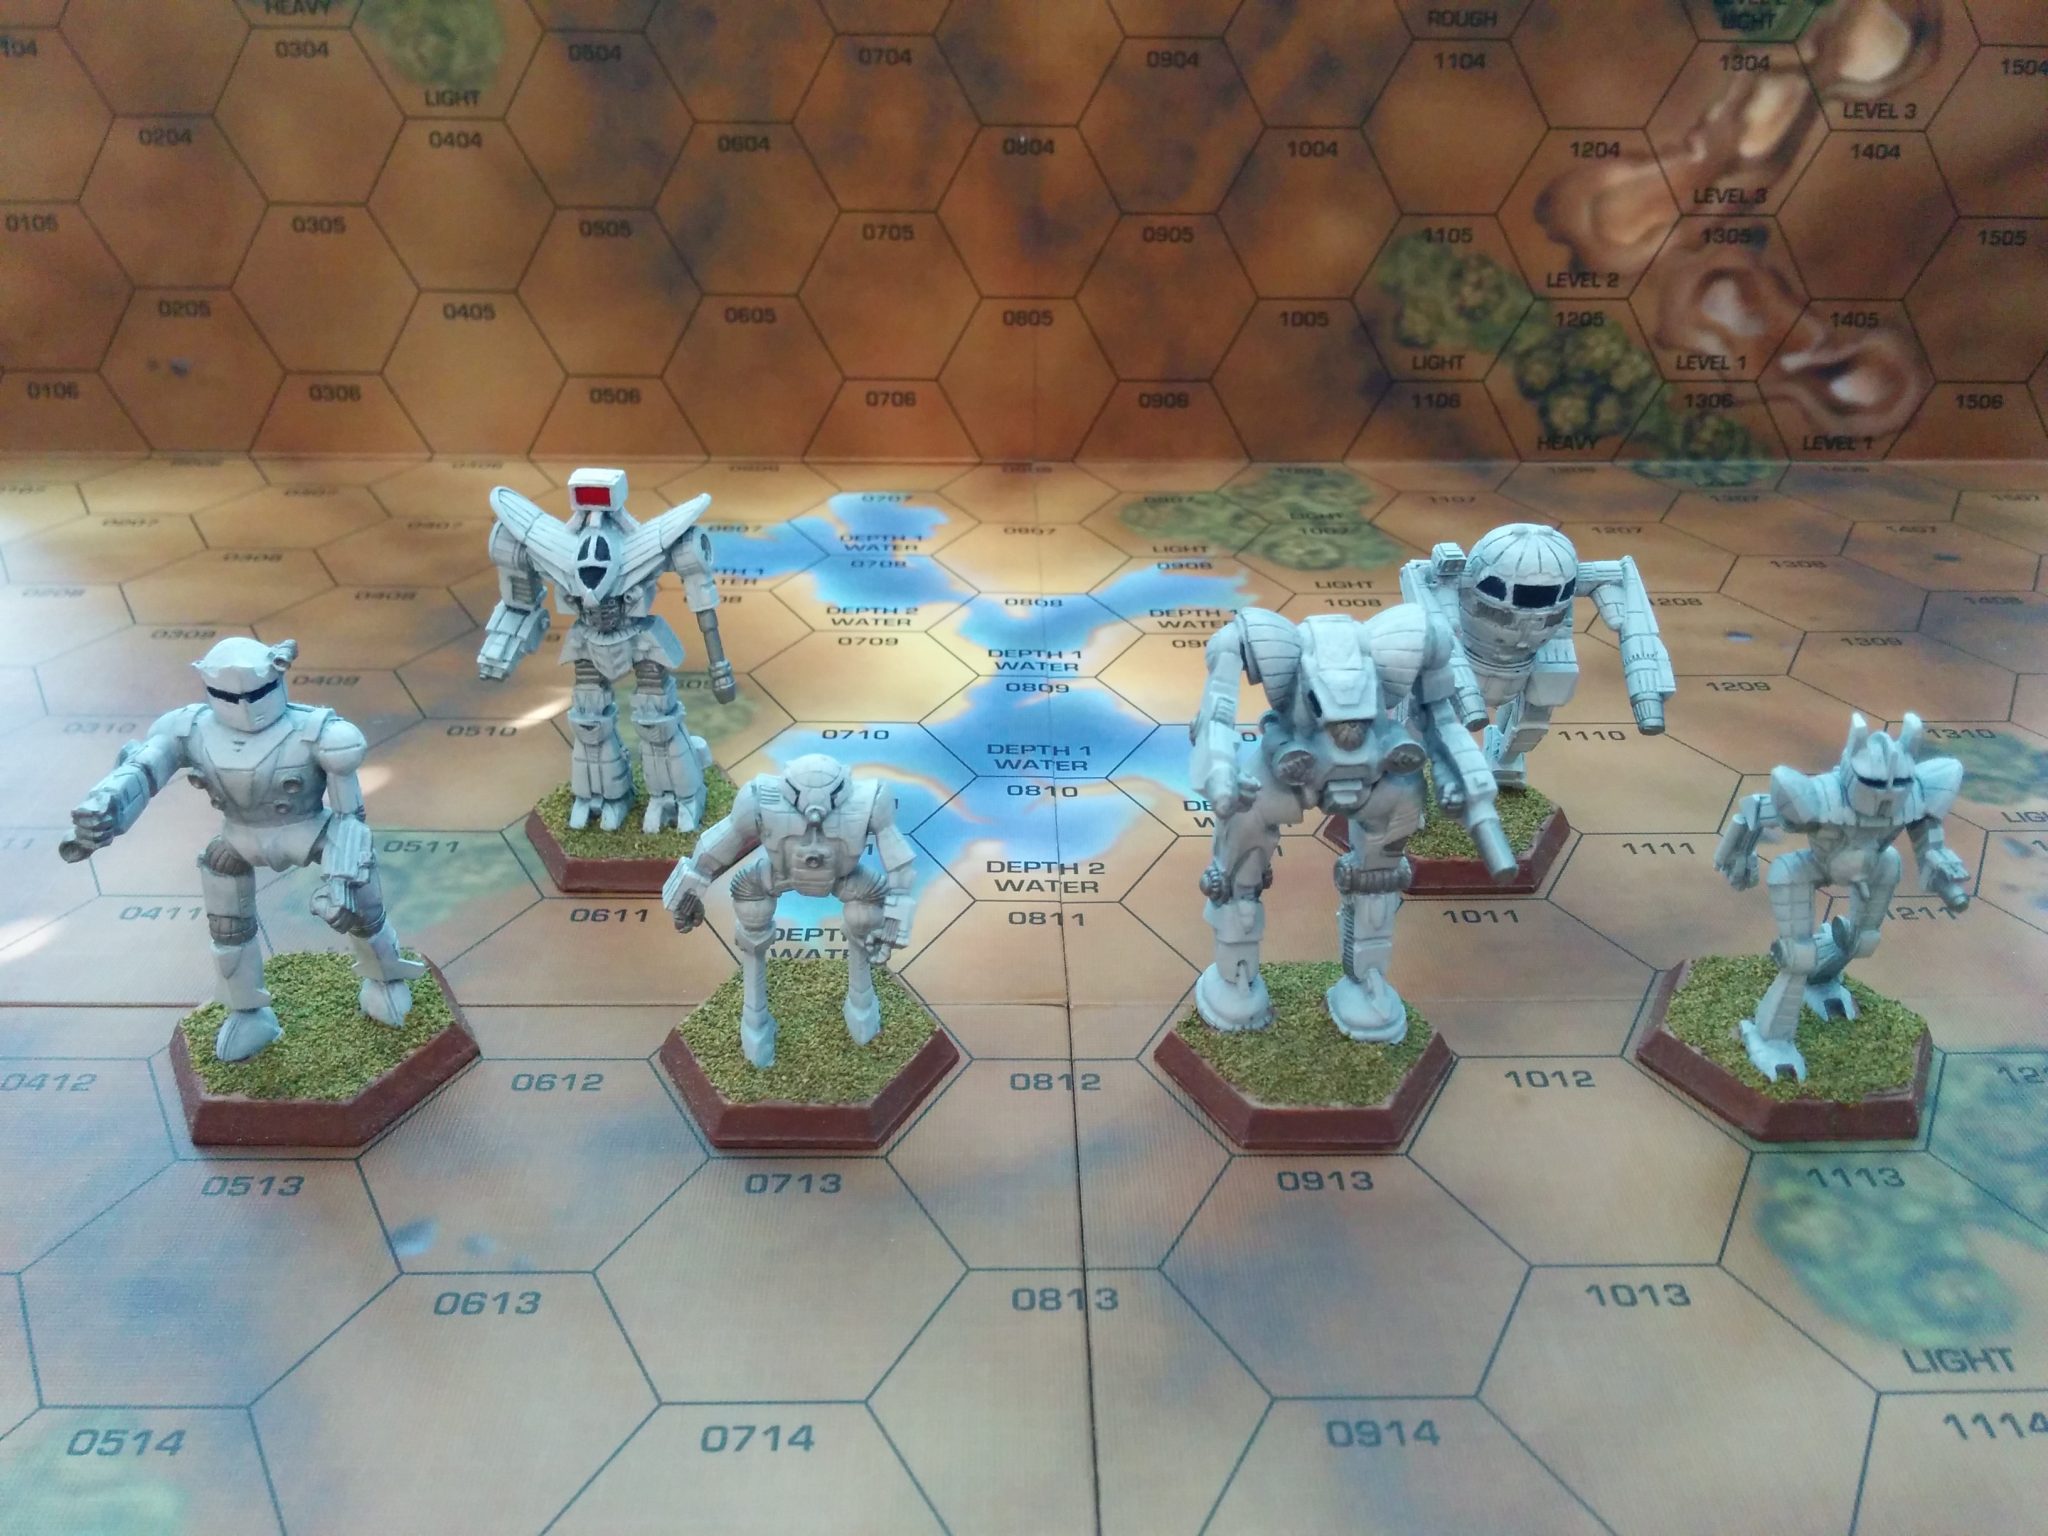
Com Guard Level II
The Com Guard force had to go super elite in order to match the Battle Value of Clan Coyote. All of the Com Guard ‘Mechs were using Star League tech, but Clan tech is weighted so heavily in BV2 that this is the result. Both myself and my opponent would much rather have seen two Lances instead of a Level II, giving the opposing force eight ‘Mechs to fill in the roster, but we had to work with what we had. I was curious to see how the game would progress, as the Com Guard force would severely test the superiority of Clan technology.
Map and Scenario
We wanted to keep the scenario fairly simple. The attacking force (Clan Coyote) had happened upon a ComStar deep reconnaissance base on a planet near the Kerensky Cluster. The Com Guard force, an elite unit that had been dispatched to collect intelligence on the Clans. Clan Coyote dropped on the outskirts of the ComStar mobile base facility, with the goal of disabling or capturing the ComStar dropship before it could power up. Standing between the dropship and the Coyotes is an elite Com Guard Level II that must destroy or disable the Coyote Star in order to mount a counter attack against the Coyote dropship, which was off map some distance away.
The deployment zones were established as anywhere on the “Facility” maps for Com Guard and anywhere on the far opposite side maps for Clan Coyote.
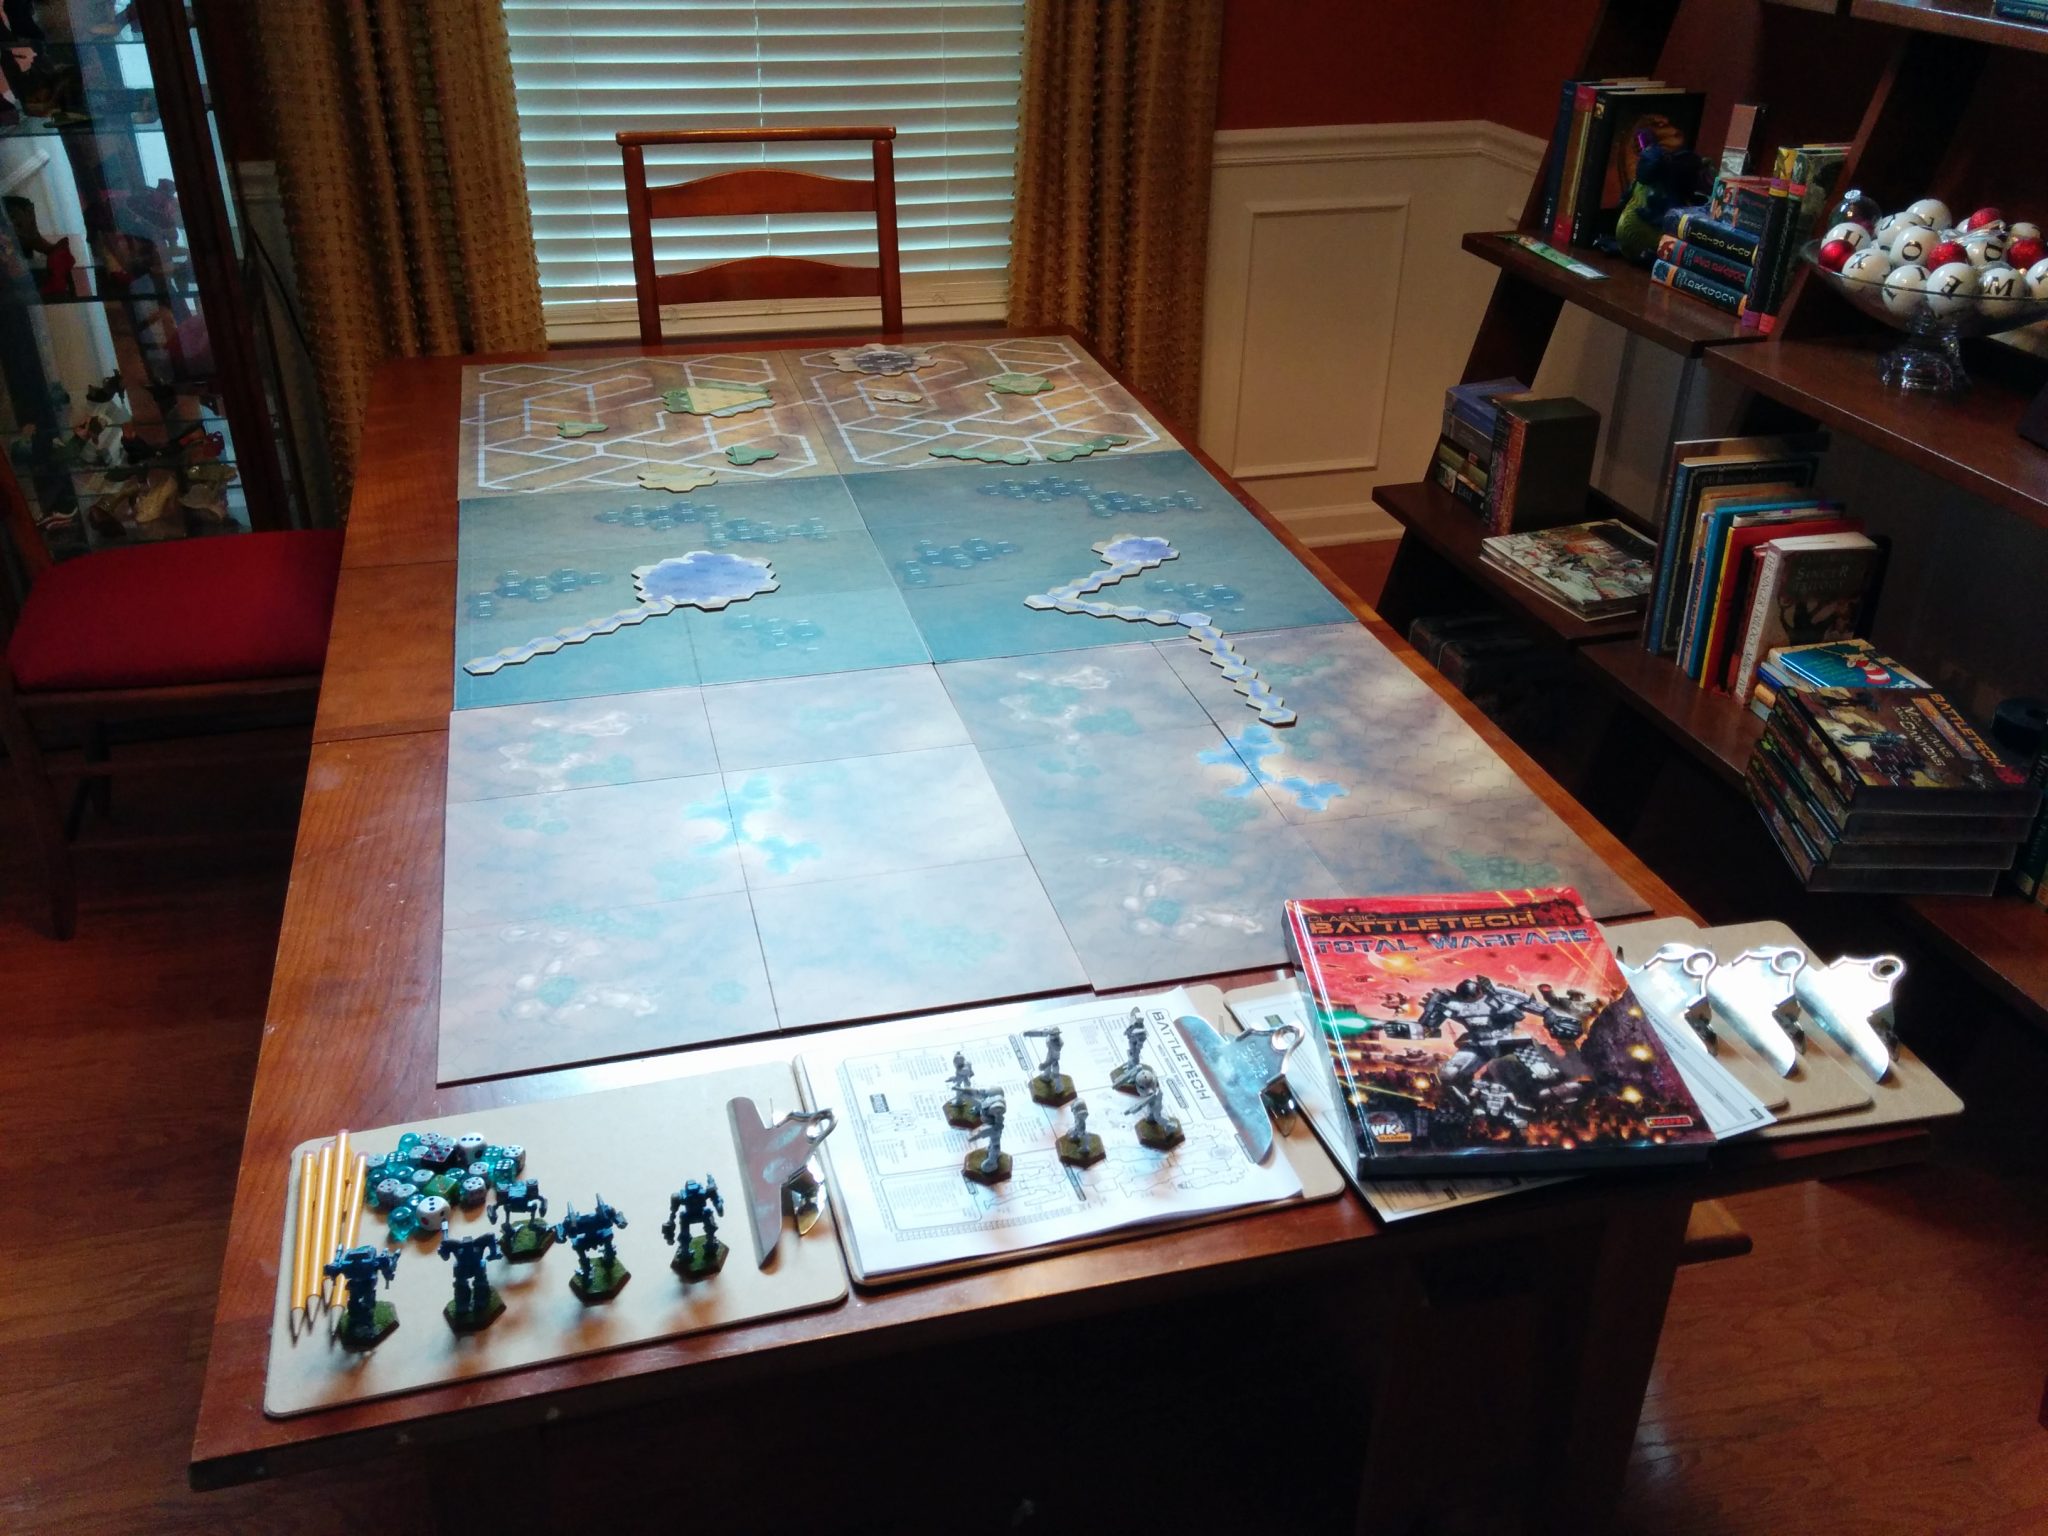
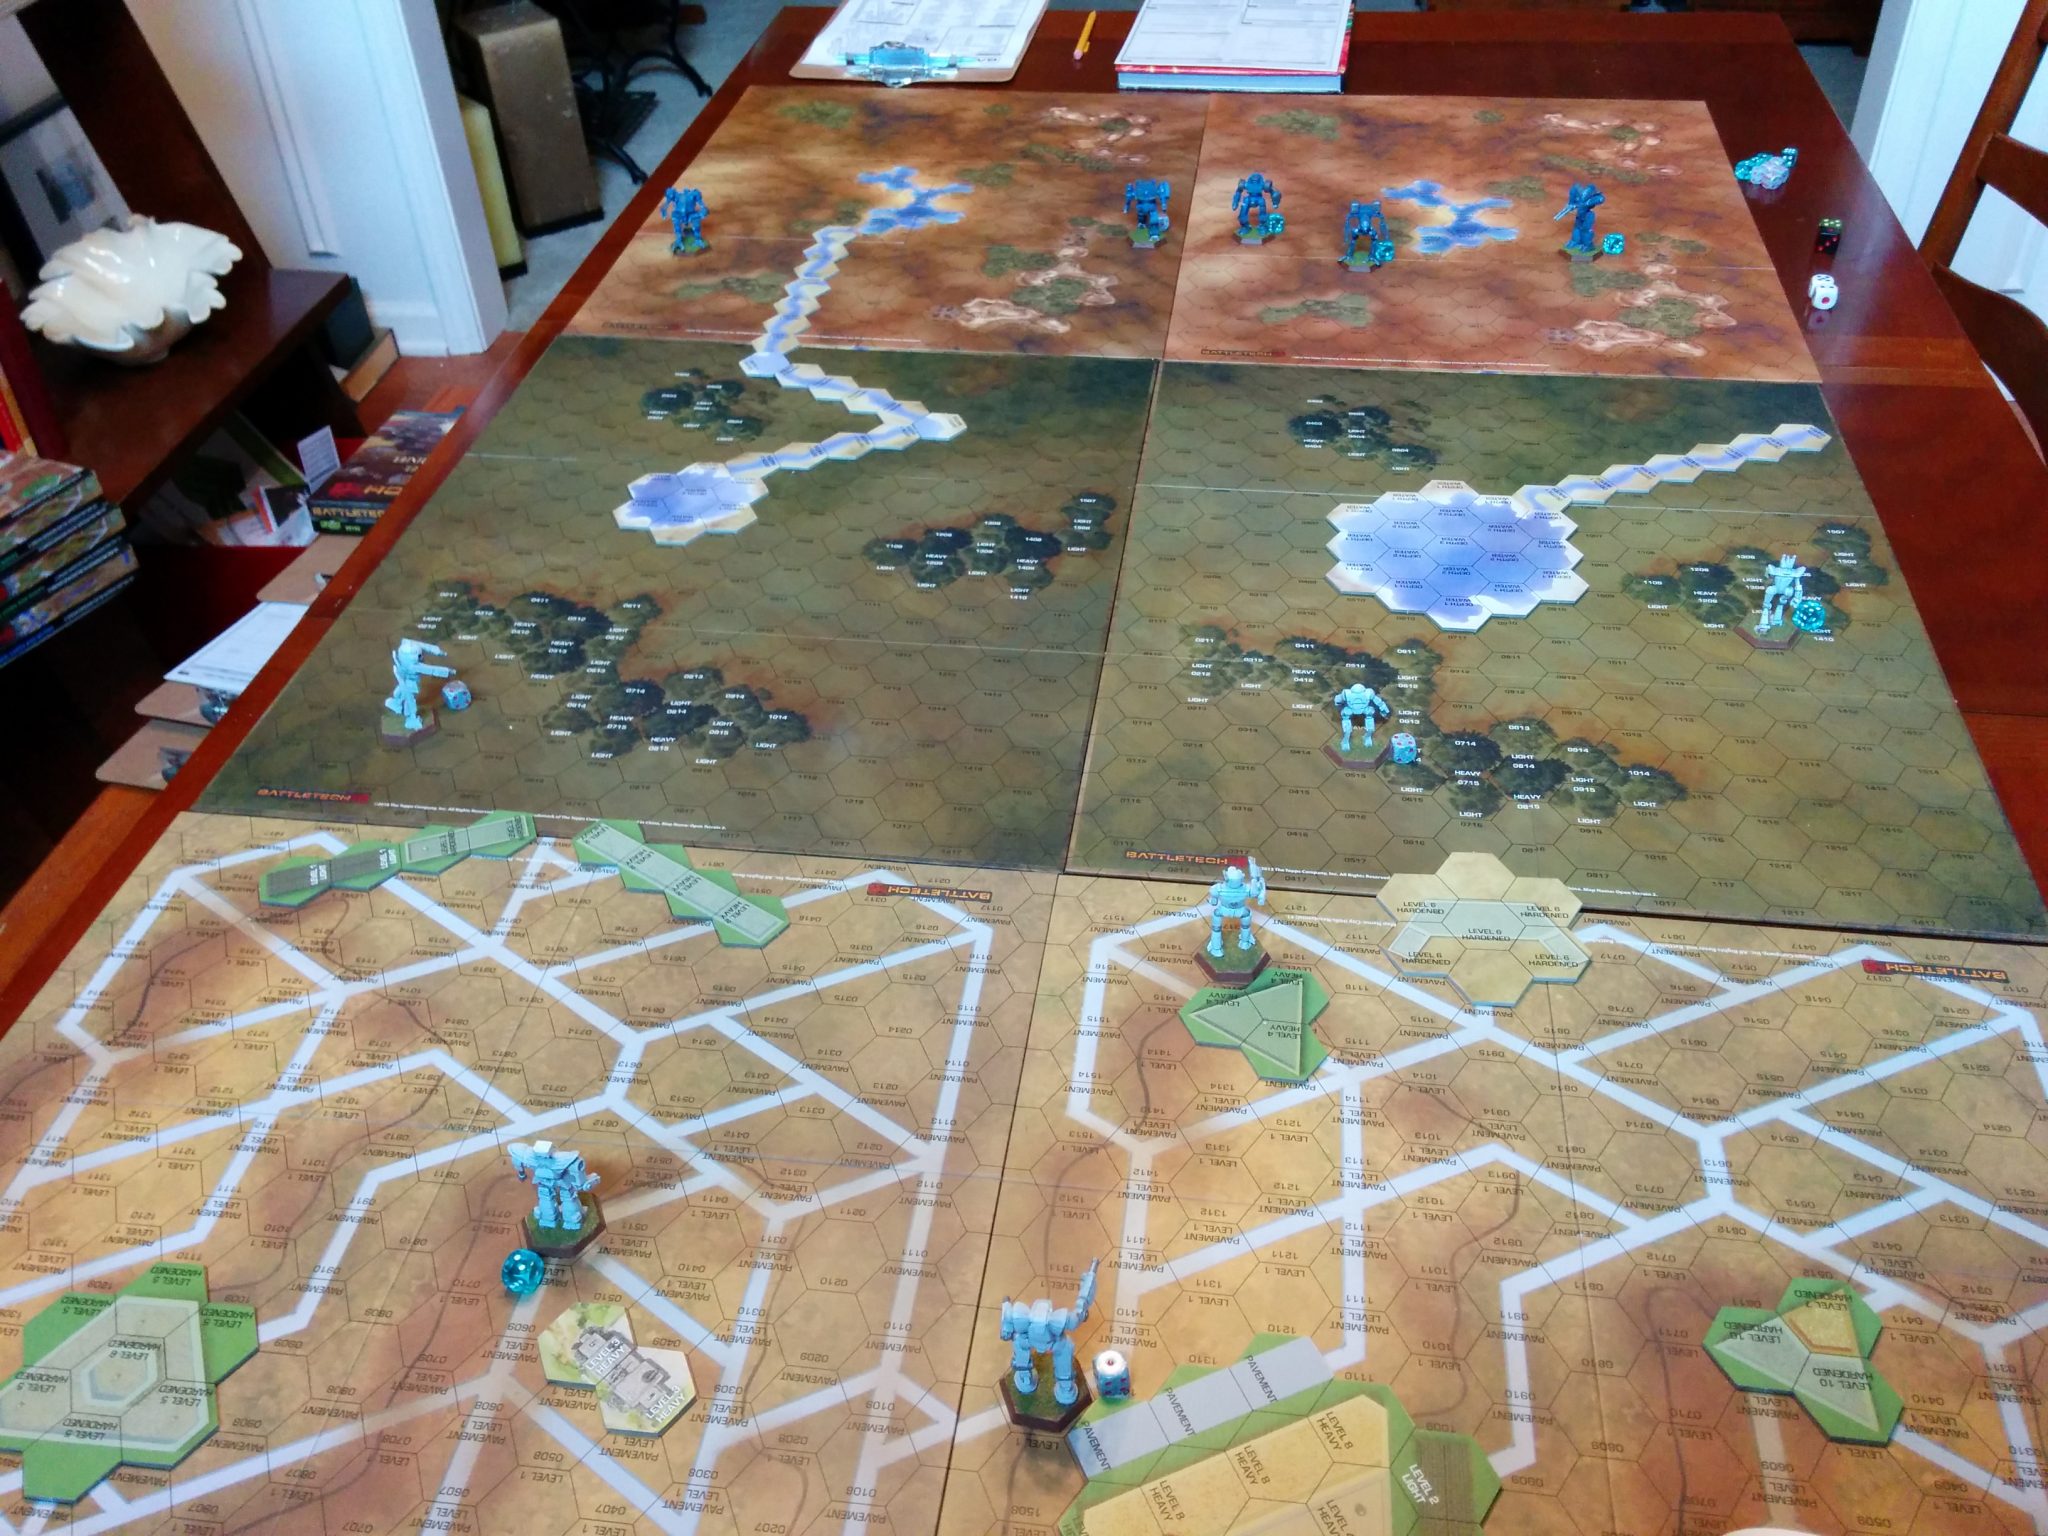
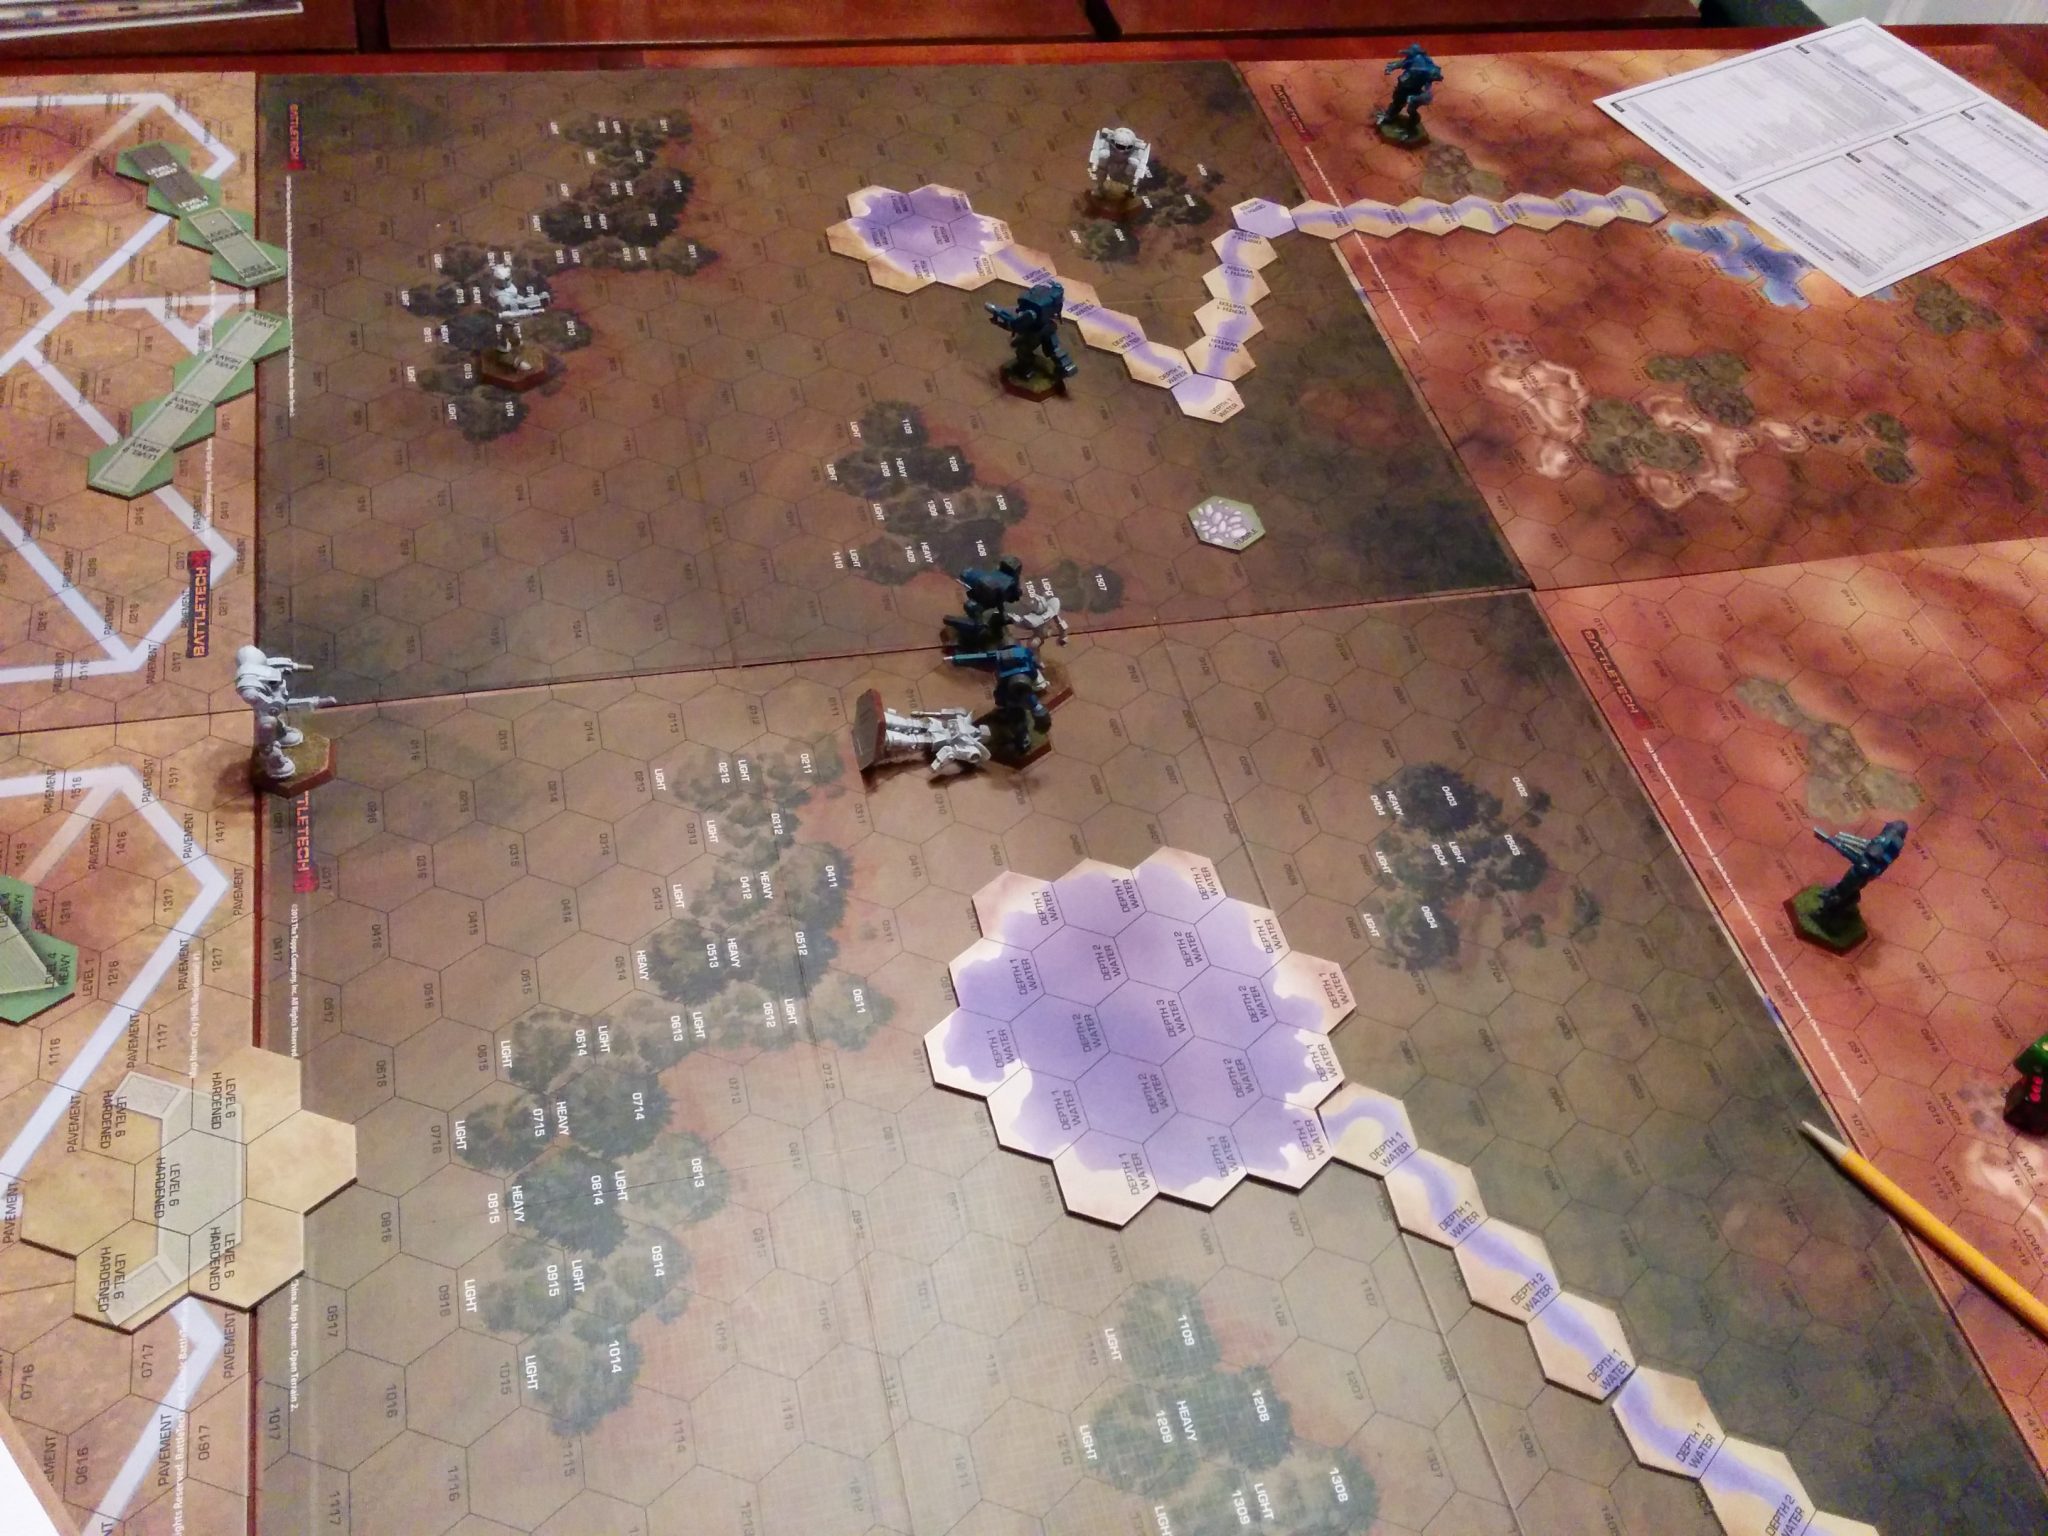
Map Setup
Ok, so maybe we put a little too much back story into the scenario than we actually had to. In the end, we just wanted to destroy one another, but I usually need a reason. Feeling adequately motivated to be attempting to destroy the Com Guard forces, I proceeded to drop into the action.
The Com Guards won initiative for setup, and deployed mostly in the facility, using the buildings to hide from the attackers.
Clan Coyote deployed conservatively, well within their deployment zone, allowing for a tactical approach to the Facility that would account for surprises and minimize ambush potential. The thought behind the measured approach was that the Com Guard would get impatient waiting for the Coyotes to arrive and leave the protection of the Facility to engage the Clan forces.
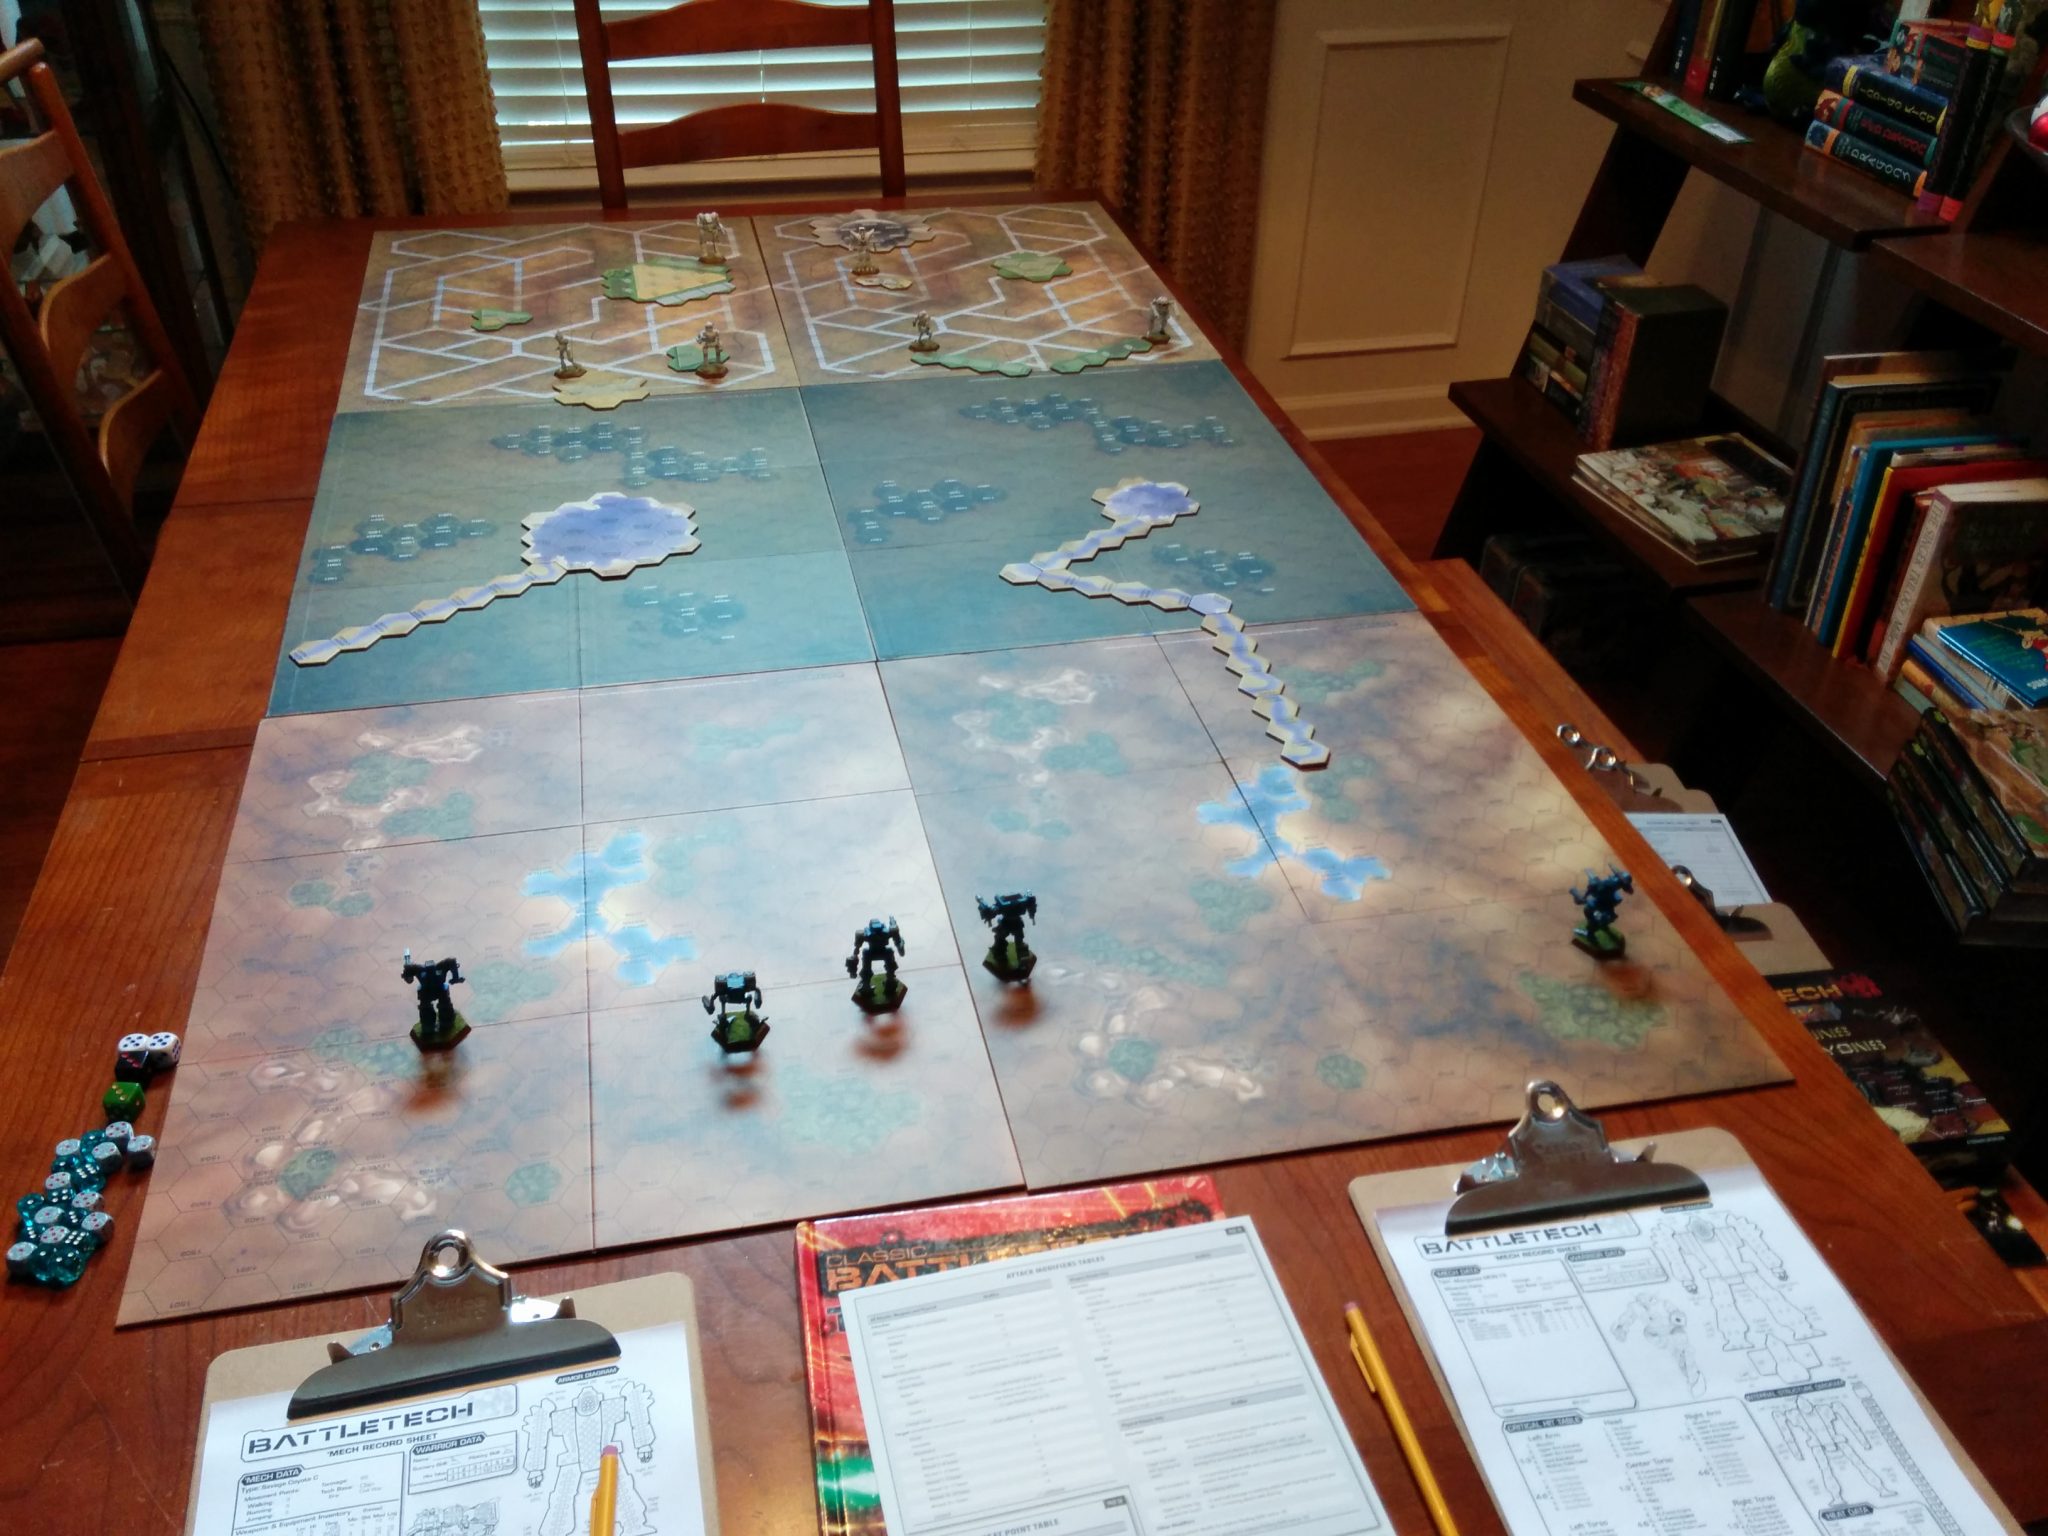
Deployment
Turn 1 – Clan Coyote Wins Initiative
Movement Phase: The Coyote ‘Mechs moved ahead at full speed, with the Savage Coyote, Timber Wolf, and Highlander IIC forming up in the center and the Guillotine IIC and Septicemia flanking to either side. The Com Guards advanced forward, which was a move I did not expect, using the ample building and tree cover to gain forward positions. The Thug stayed back, and I suspected it was being kept in reserve and would engage after the battle had begun.
Turn 1
Weapon Attack Phase: No units could establish line of sight with the enemy at this point. We knew they were there, but we did not know exactly where.
Turn 2 – Com Guard Wins Initiative
Movement Phase: The Com Guards took the bait, and they began advancing outside the protected walls of the Facility. The Hermes and Mongoose advanced quickly, behind the cover of the woods, opposite the Guillotine IIC. The Flashman moved into a firing position on the quickly advancing Septicemia, and the rest of the ‘Mechs on both sides advanced towards one another in the center of the map. This was shaping up to be a colossal clash, once someone got line of sight and range.
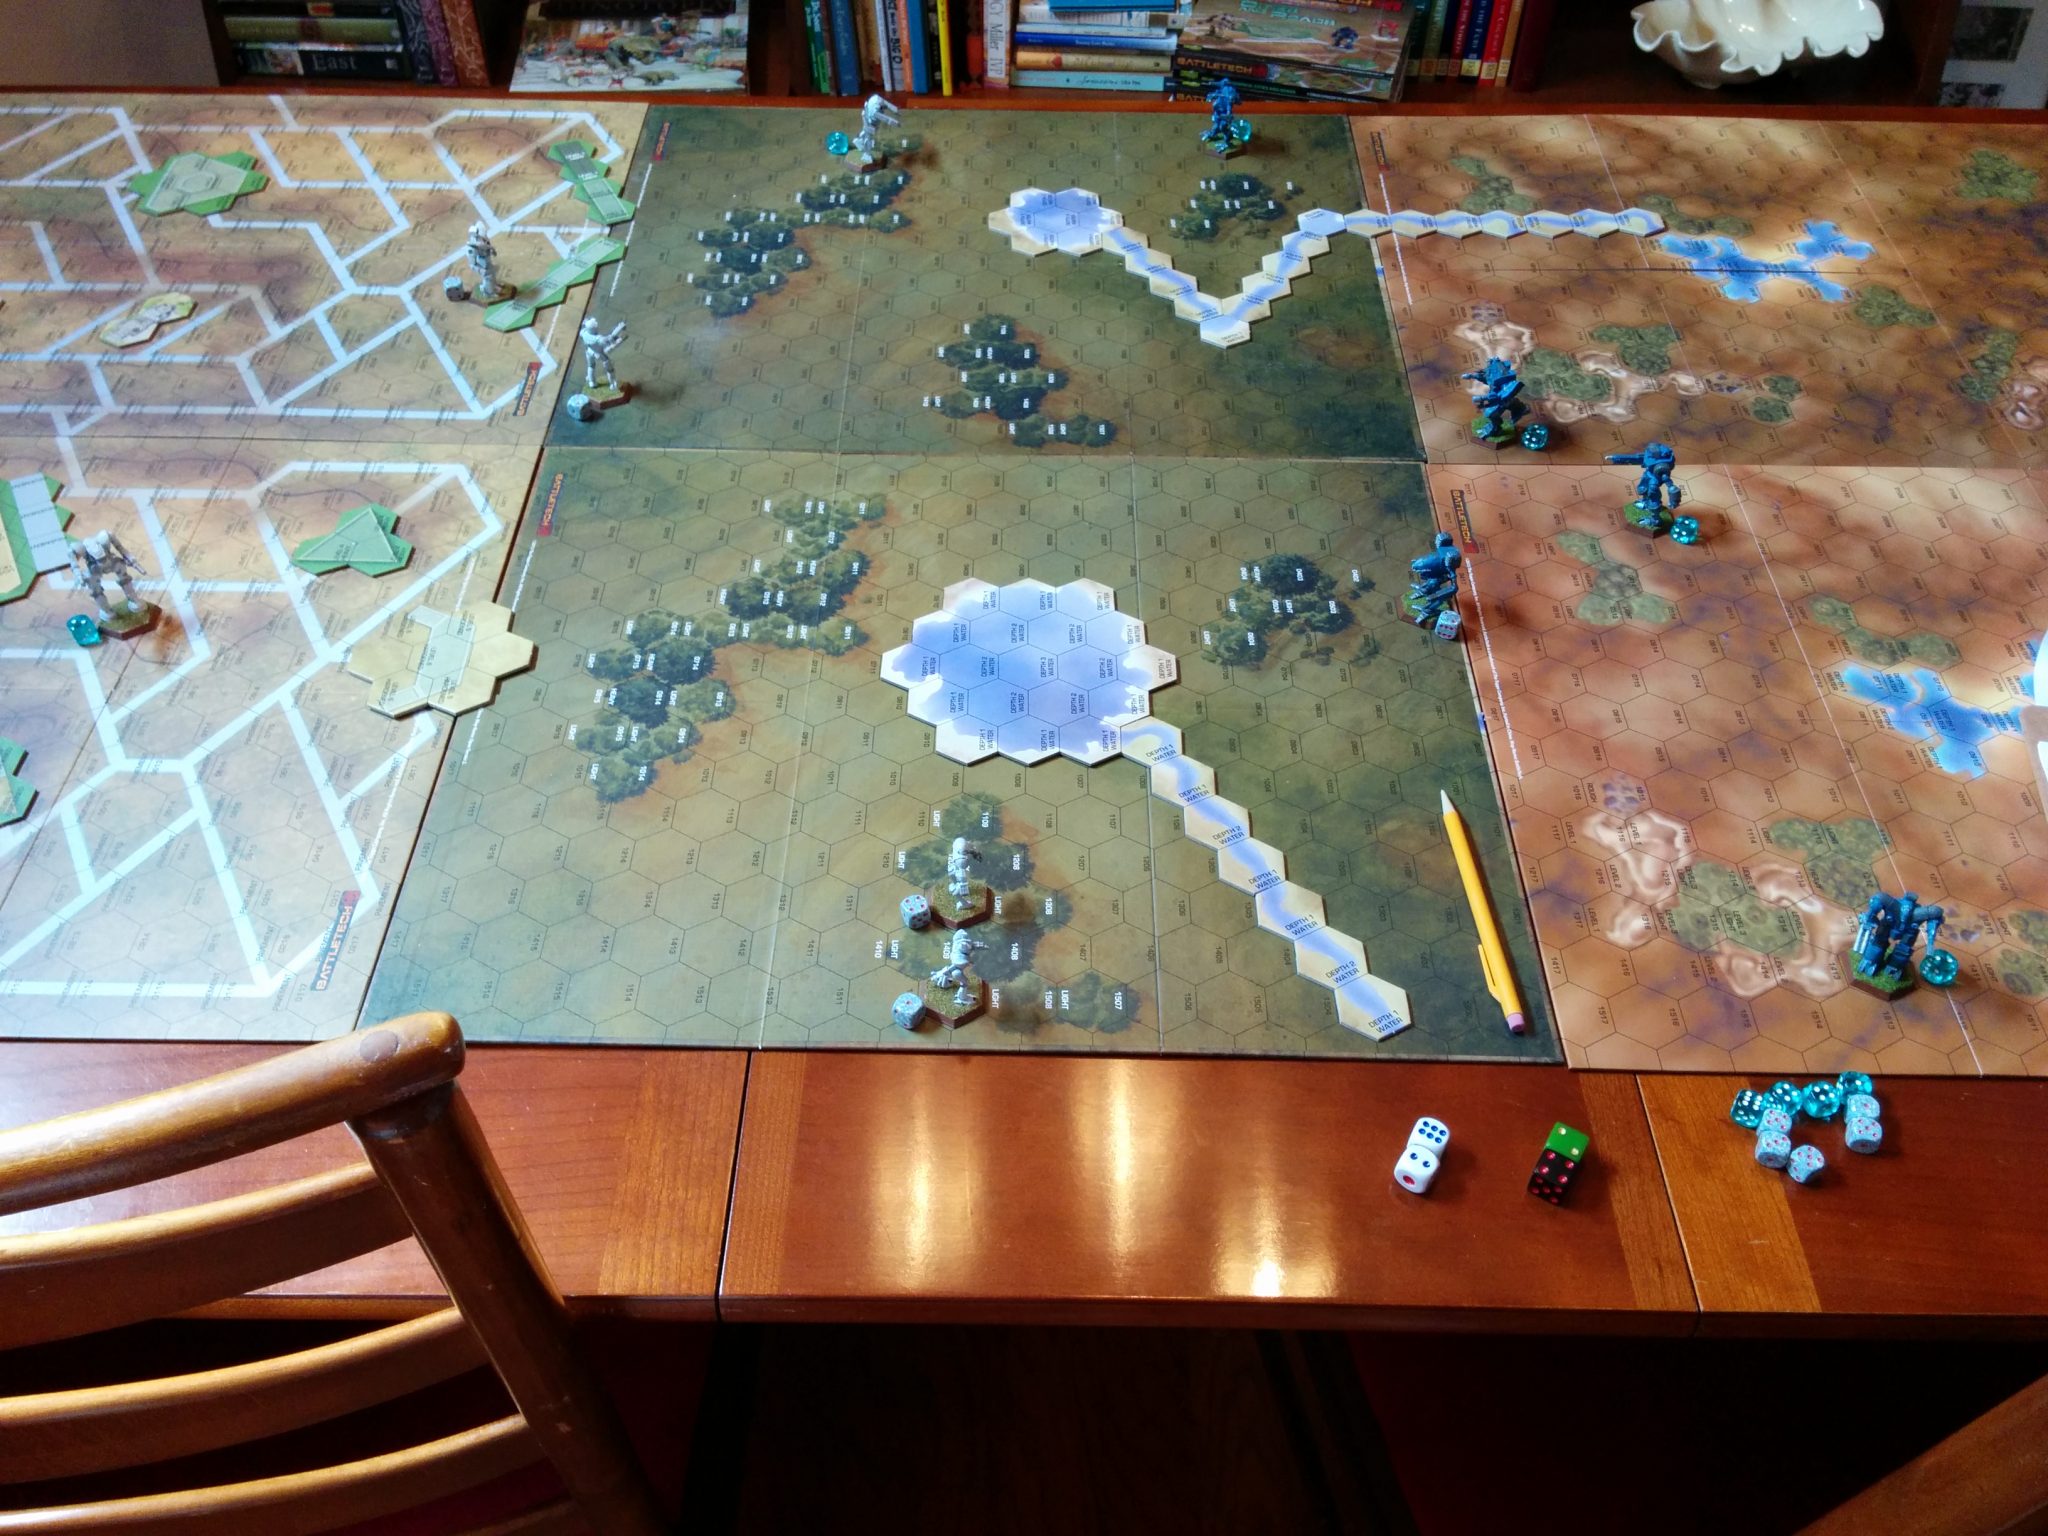
Turn 2
Weapon Attack Phase: The Flashman took the opening shots of the engagement, firing its Heavy PPCs on the Septicemia and missing both times. The Septicemia, surprised by the fury of the assault, was able to lance out with its Large Pulse Lasers, scoring a single hit on the Flashman. The battle had begun.
Turn 3 – Clan Coyote Wins Initiative
Movement Phase: The Flashman advanced toward the Septicemia, wanting to use extreme close range to savage the smaller ‘Mech with its heavy energy weapons, but the Septicemia jumped over the small lake for tactical protection, right into the sights of the Black Knight! The Com Guards used the heavy woods in the middle of the map to their advantage, moving into a position to reduce the line of sight that Clan Coyote could achieve whilst taking a turn to beat up on the Septicemia. On the opposite side of the map, the Hermes and the Mongoose used their superior speed to flirt with danger by moving right up into the grill of the Guillotine IIC. However, thanks to mountain and level shenanigans, the Guillotine IIC could not see either of them! Not even the Mongoose, which ended its movement two Levels below the Guillotine IIC.
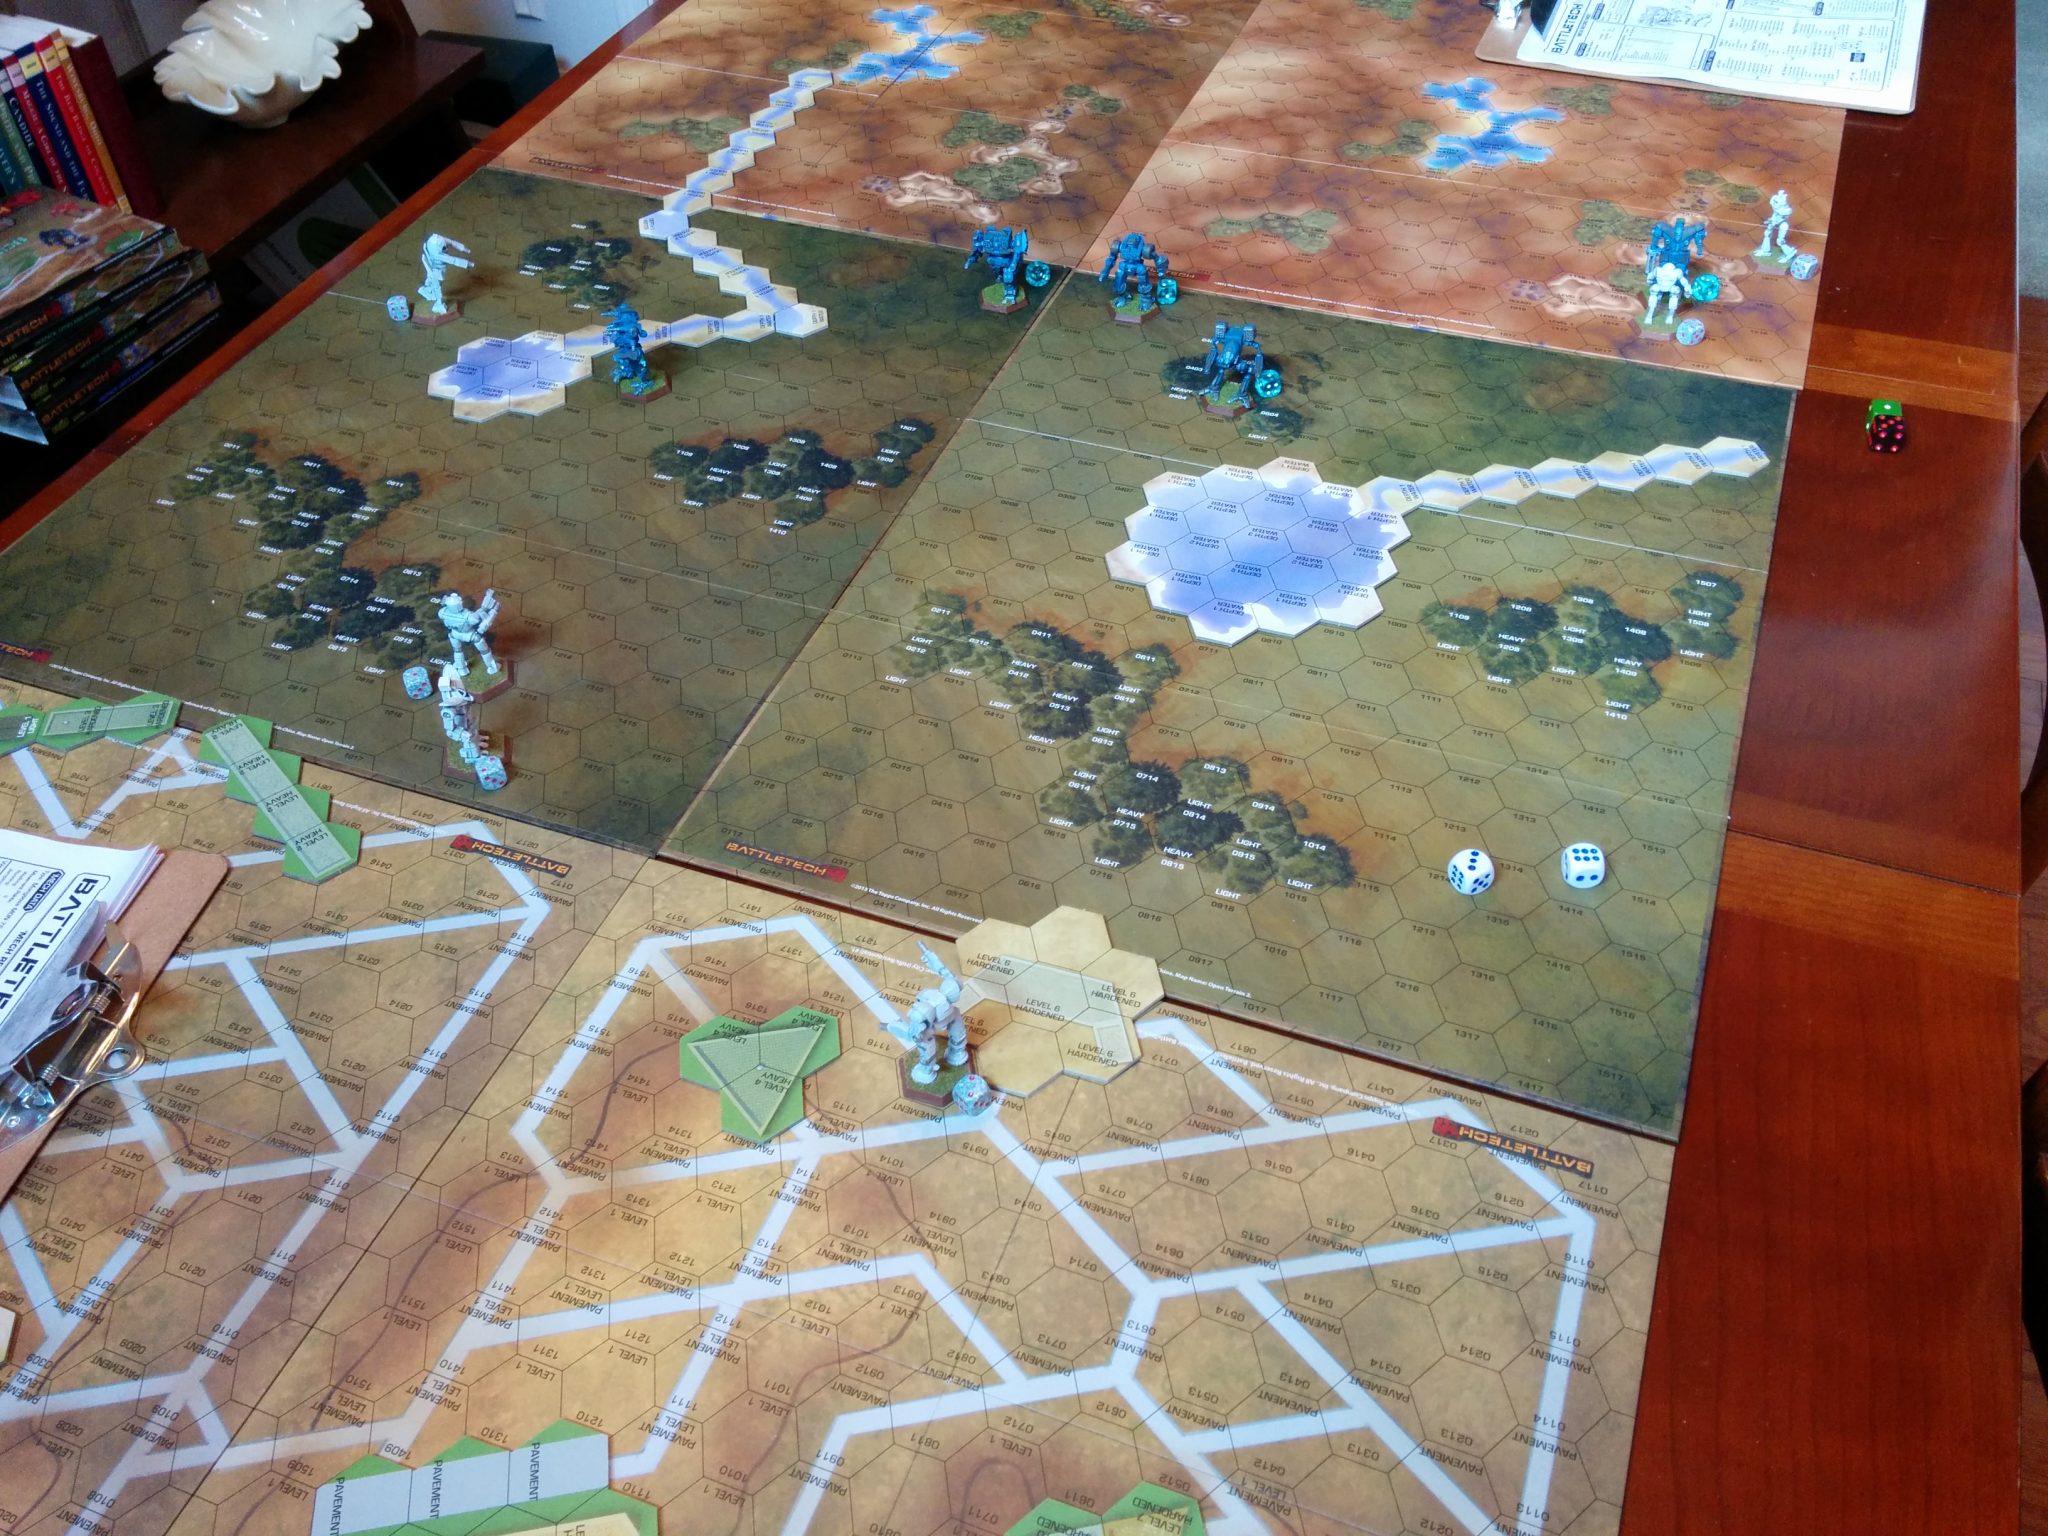
Turn 3
Weapon Attack Phase: The Flashman pounded the Septicemia with its Heavy PPCs, and the Black Knight also fired on the Septicemia, hitting with its PPC. A Piloting Check saved the Septicemia from any significant damage. The Timber Wolf did not appreciate the dezgra actions of the Black Knight and fired upon it with just about everything, scoring major hits. The Septicemia was able to score another mark in the Flashman’s armor, and ended the turn in an awkward position, the rest of its Star not quite able to help as much as I would have liked.
Turn 4 – Clan Coyote Retains Initiative
Movement Phase: The Flashman made a critical error which allowed the Septicemia to jump into its rear arc. Unfortunately, this left the medium ‘Mech vulnerable to further predations from the Black Knight. The Timber Wolf advanced on the Black Knight while the Savage Coyote peeled to the right to deal with the Flashman. At this point, Clan Coyote felt justified not sticking to zellbrigen due to the Com Guards’ actions thus far, and from here on out, it was no holds barred. The Hermes and the Mongoose surprised me and broke off from the Guillotine IIC, instead driving for the vulnerable back sides of my heavier ‘Mechs. The Guillotine IIC had no choice but to pursue as best it could, and the Com Guard Thug advanced from behind cover along with the Guillotine.
Turn 4
Weapon Attack Phase: The Guillotine IIC tried to get a bead on the Mongoose in the hopes of slowing down the backfield invasion, but it was just moving too quickly for a clean shot. Fortunately, both the Mongoose and the Hermes ended up being completely out of range of their intended target, the Savage Coyote. The Flashman, seeing a big, shiny Clan assault ‘Mech in its crosshairs, leveled its Heavy PPCs at the Savage Coyote and let loose. Only one of the massive weapons hit, and the Savage Coyote replied with a PPC shot of its own, finding its mark in the Com Guard ‘Mech’s armor. The Septicemia, having achieved a tactical position on the Flashman, drilled into it with two Large Pulse Lasers, hitting extremities and only serving annoy the elite Com Guard pilot. The Black Knight, in a single-minded madness that ignored the threat of the approaching Timber Wolf, continued its assault on the Septicemia, breaching the smaller ‘Mech’s armor in several places and damaging its Gyro. The Timber Wolf scored a few hits on the Black Knight, but not enough to get its full attention. The Highlander IIC and the Guillotine exchanged barrages, with the only hit being in the form of the Guillotine’s PPC splashing against the assault ‘Mech’s ample armor. The Thug also entered the fray, landing a PPC shot on the Timber Wolf, attempting to ward the Clan ‘Mech away from the Black Knight.
Turn 5 – Com Guard Wins Initiative
Movement Phase: The Septicemia retreated into a wooded area for a turn in order to cool off while the Flashman and Black Knight both held their positions in order to take maximum advantage of their elite Gunnery. The Savage Coyote advanced to a location between the Black Knight and the Flashman, intent on taking the hits and bullying both smaller ‘Mechs into submission. The Timber Wolf held its ground despite the looming threat from the Thug and continued to focus on the Black Knight, hoping to support the Savage Coyote. The Hermes and Mongoose moved into firing positions in the backfield, targeting the Timber Wolf and Savage Coyote respectively. Moving in behind the lighter Com Guard ‘Mechs, the Guillotine IIC was able to get into a position to finally support his team. Meanwhile, the Highlander IIC moved forward to engage the Guillotine, only to have the Guillotine attempt at Death From Above attack!
I couldn’t believe it. A Highlander was about the get a DFA performed on it! How often does that role reversal happen?

Turn 5 Movement
Weapon Attack Phase: This round was even more chaotic than the previous, with several dozen shots ringing out all over the battlefield. The Flashman barraged the advancing Savage Coyote with both of its Heavy PPCs, and the return fire from the Clan Assault ‘Mech sheared one of the Flashman’s arms off in response. The Black Knight was able to get several good hits in on the Savage Coyote as well, breaching the Clan ‘Mech’s left arm armor. The Timber Wolf performed an Alpha Strike on the Black Knight that left it barely standing, but not out of the fight, and the Thug let the Timber Wolf know that it was still there by removing the Coyote ‘Mech’s left arm. The Hermes and Mongoose both lanced into their targets but were unable to pierce the rear armor of their targets, while the Guillotine IIC brought the Mongoose to an end with only a few well placed shots. First blood to Clan Coyote! The Highlander IIC performed an Alpha Strike on the jumping Guillotine, but did not do enough damage to avoid what was about to happen.
Physical Attack Phase: The Guillotine connected with its DFA attack, but it failed to do any damage to the Highlander IIC’s cockpit. What’s more, the supposedly elite Com Guard pilot then failed his Piloting roll to stay standing and ended his turn face down in front of the relatively unharmed Highlander IIC.
Turn 5 End Phase
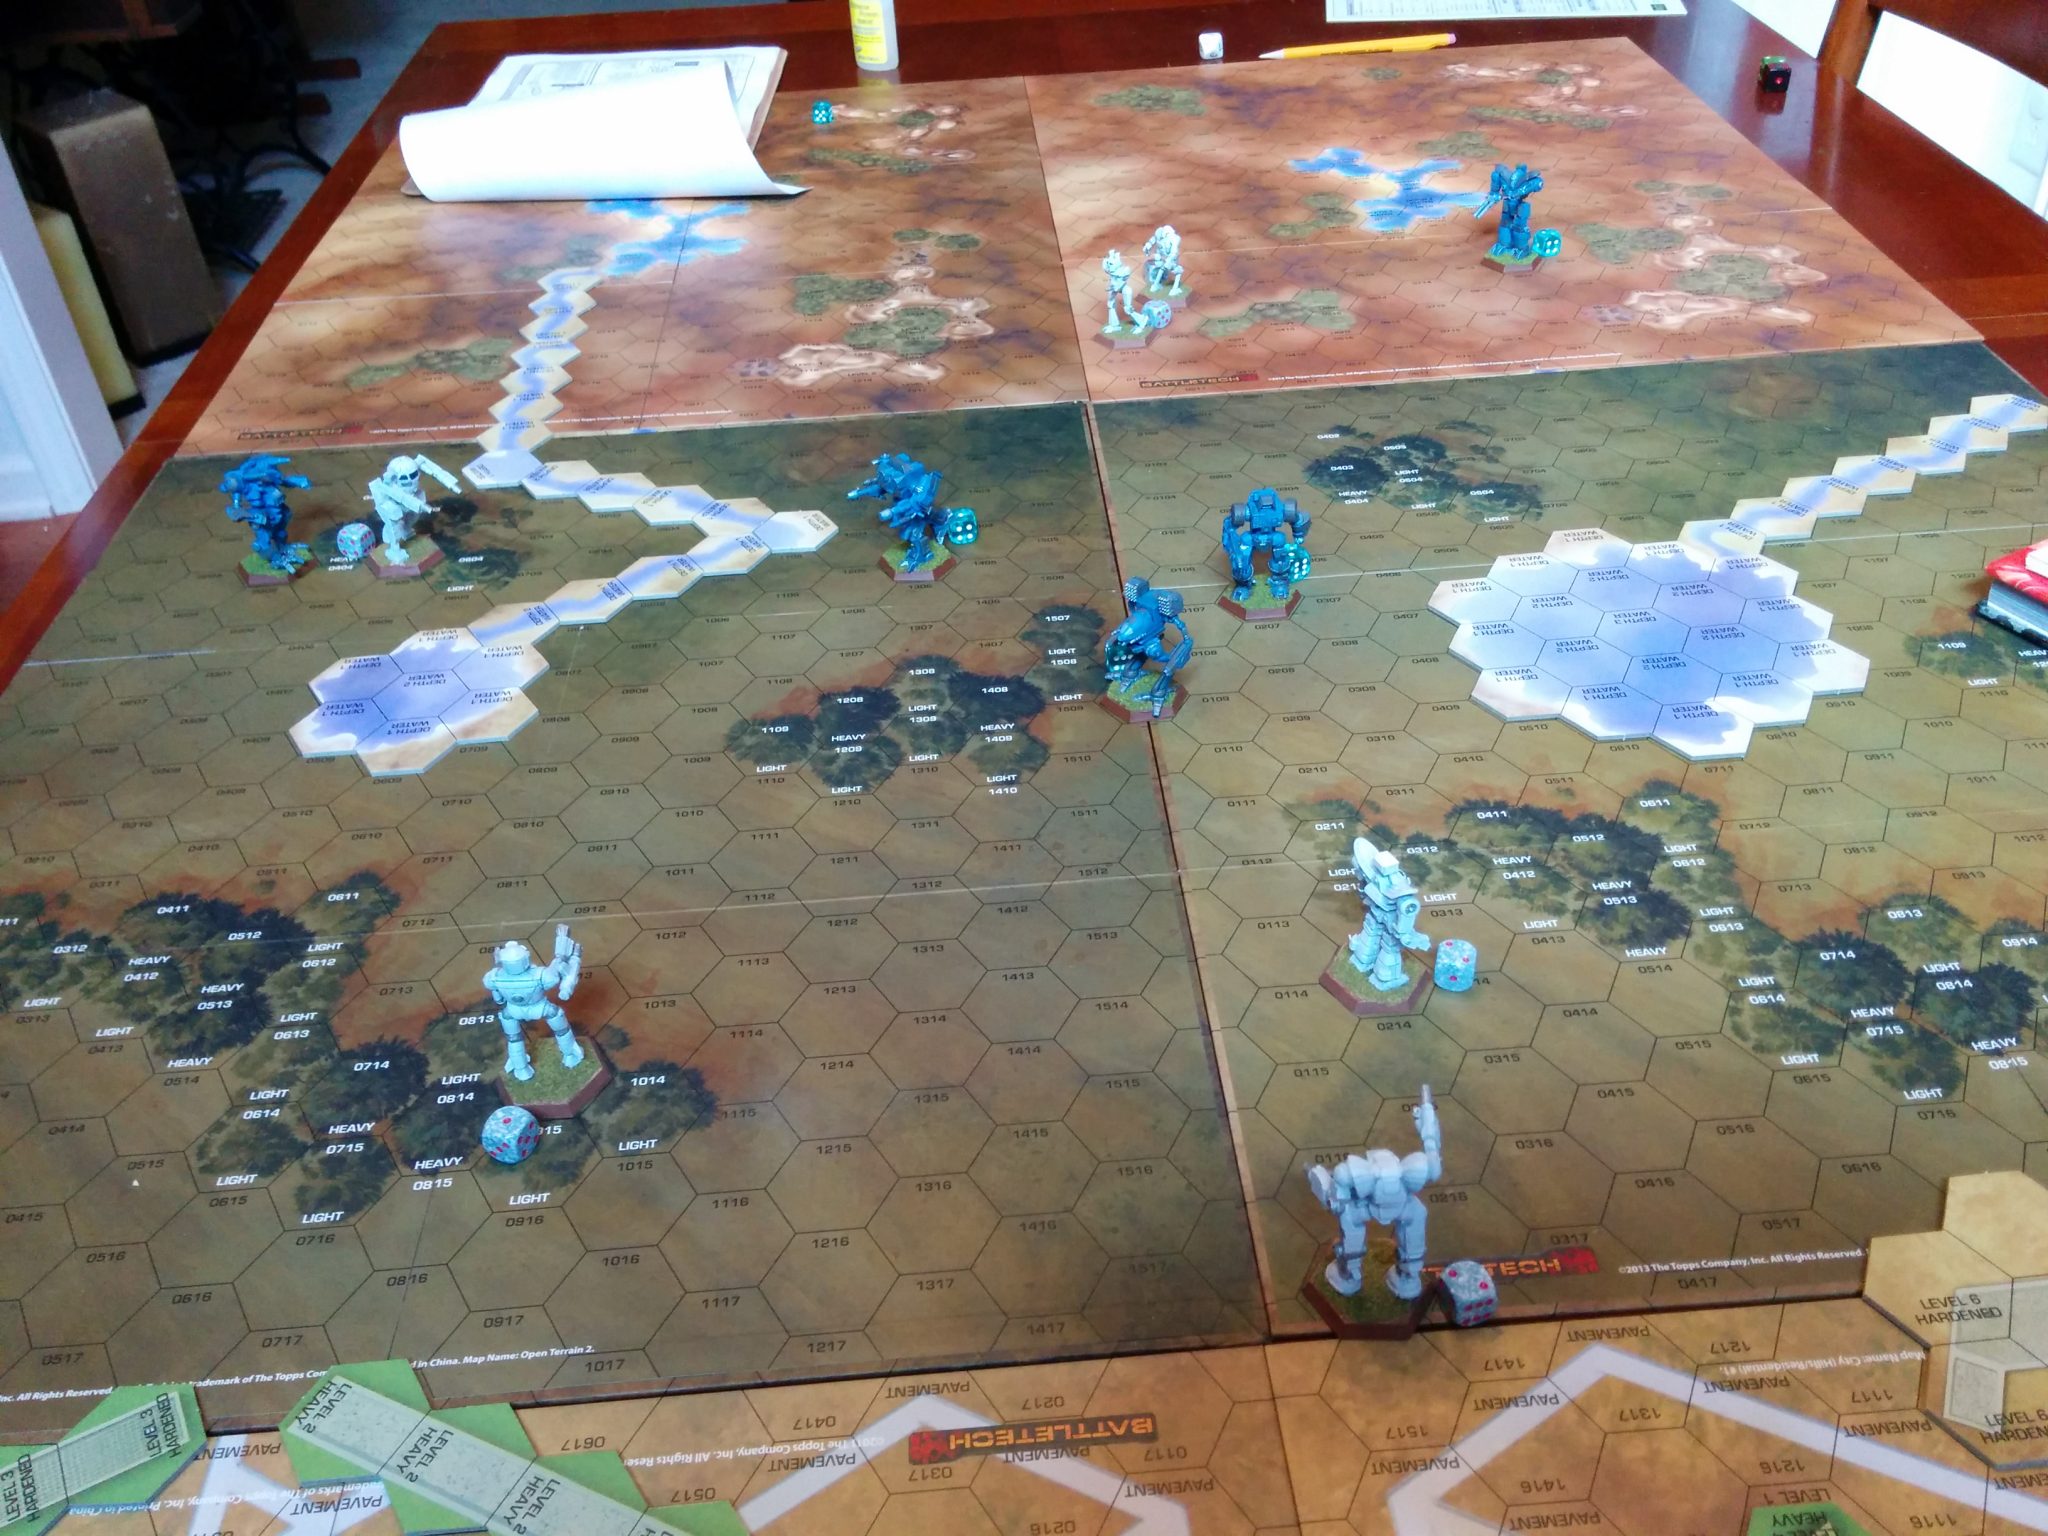
Turn 6 – Clan Coyote Wins Initiative
Movement Phase: The Flashman and Septicemia resume their duel, moving face-to-face to determine a winner in their epic showdown. This allows the Savage Coyote to divert its attention wholly to the Black Knight, which in turn backs up to gain more protection from the woods and put some distance between it and the angry Coyote. The Timber Wolf, content to let the Savage Coyote deal with the Black Knight, charged forward to engage the Thug at point blank range, nullifying much of the Thug’s potency. The Thug, confident that it and the Hermes can finish off the wounded Timber Wolf, holds its ground as the Hermes easily keeps pace with the Timber Wolf. The Guillotine IIC maneuvers into a firing position on the Hermes, not content to let the smaller ‘Mech get away with backstabbing without consequences. The Guillotine pilot is able to stand up the ‘Mech and jumps backward on gain some distance from the Highlander IIC. The Highlander IIC marches forward to engage its foe at as close a range as possible. Here I briefly considered returning the favor of the DFA, but I didn’t like my chances against a superior Pilot.

Turn 6 Movement
Weapon Attack Phase: The Septicemia unloaded on the Flashman, performing an Alpha Strike that failed to down the Com Guard ‘Mech, though it badly wounded it. The Flashman responded with a perfectly placed Heavy PPC shot that destroyed what was left of the Clan ‘Mech’s Center Torso, ending the Septicemia in a blaze of light and flame. Meanwhile, the Black Knight and the Savage Coyote unloaded Alpha Strikes into one another, both of the pilots intent on making this turn the final turn for the other. Both ‘Mechs still stood when the smoke cleared, and both ‘Mechs were too hot to do much else than look at one another for a while, too. The Hermes savaged the Timber Wolf’s rear torso armor, causing a breach that it was unable to capitalize upon. In response, the Guillotine IIC connected with two perfect shots, destroying the Hermes in one turn, much like it had the Mongoose in the previous turn. The Thug fired its SRM6 racks at the Timber Wolf, hoping to take advantage of a weakness in its front armor, but it could only stand and watch as the Clan ‘Mech weathered the assault and buried the Thug in a hail of High Explosive missiles from its ATM racks. The Thug’s pilot never saw the hits coming. The Guillotine, sensing grave trouble, performed an Alpha Strike on the approaching Highlander IIC, which weathered the storm as if swatting away a gnat. The Highlander IIC, unable to fire many weapons due to the previous turn’s Alpha Strike, elected to not fire on the Guillotine.
Physical Attack Phase: But the Highlander IIC was not going to let the Guillotine off that easy. On approach, the Coyote ‘Mech pulled back with its leg and let fly a massive kick that sheared off one of the Guillotine’s legs and left it once more prone on the ground in front of the mighty Assault ‘Mech.

End of Game
The Com Guards, seeing the dire hopelessness of the situation, decided to surrender after Turn 6.
Victory to Clan Coyote!
Aftermath
I was very pleased with Clan Coyote’s performance. I did not expect to come out of the battle with four of my ‘Mechs still operational, two of which were still fully operational, and one had never been damaged! I expected the Com Guard to use the Facility much more to their advantage, but they instead elected to use the ample forests in the middle sections of the map. Perhaps this was better for them, being able to utilize the protection of the woods was a great advantage for a force largely not equipped with jump jets. I kept the Coyotes out in the open for the most part because I thought that is what they would do. Perhaps it did not make much sense from the perspective of a tactical game, but it was fun to play as in-character as I could.
I made certain not to break zellbrigen or violate the Clans’ general distaste of physical combat until the Com Guards did both first. I was able, in classic Clan fashion, to justify both actions because I was fighting against a clearly and demonstrably honorless opponents.
Also, I have to say that I had a lot of fun ATMs. I had never really used them before now, and they are incredibly flexible weapons. I will look to utilize them more in future games.
Overall, this was a very exciting and enjoyable game with a surprising outcome. I was actually thinking that the elite Com Guard pilots had an incredible edge over my Coyotes, but Clan tech is, I have found, always a lot tougher than it looks on paper.
I hope that all of you get to enjoy a good game of BattleTech some time soon. It may be tough to get it to happen, but I have found that it is always worth it.
– Dave
A very good read, so thank you! :)
However, one thing I noted:
“The Guillotine pilot is able to stand up the ‘Mech and jumps backward on gain some distance from the Highlander IIC.”
The Guillotine would have had to announce, prior to making the piloting roll for standing up, whether it was going to use Walking or Running MP (with corresponding heat buildup). Jumping is not a legal movement option when starting in a prone position.
Frabby – Good catch! I’m glad you enjoyed the report.
I will need to look back through my notes to see if we did it right and I wrote it wrong, or if we did do it wrong. Not that it matters, but just so I know.
BattleTech is one of those games where you can play for years and still make stupid mistakes like that from time to time. Of course, playing more often always helps with that, too.
This was great. I really enjoyed this.
What about falling-damage after a failed DFA-attack to the executing Mech?
Elsewise a nice and short match. The story is also an important factor. I like the foto-documentation.
I had not had the opportunity for a BT-session since 2010!!!