Difference between revisions of "Operation Flashpoint Gallery"
Sarna News


m (added artist credits, dropped year from each) |
(added image) |
||
| (2 intermediate revisions by the same user not shown) | |||
| Line 7: | Line 7: | ||
Image:Operation Flashpoint (6).jpg|Illustration by Matthew Plog | Image:Operation Flashpoint (6).jpg|Illustration by Matthew Plog | ||
Image:Operation Flashpoint (7).jpg|Illustration by Matthew Plog | Image:Operation Flashpoint (7).jpg|Illustration by Matthew Plog | ||
| − | Image:Operation Flashpoint (8).jpg|Illustration by | + | Image:Operation Flashpoint (8).jpg|Illustration by Matthew Plog |
| − | Image:Operation Flashpoint (9).jpg|Illustration by Christina Wald | + | Image:Operation Flashpoint (9).jpg|Illustration by [[Christina Wald]] |
Image:Operation Flashpoint (10).jpg|Illustration by Christina Wald | Image:Operation Flashpoint (10).jpg|Illustration by Christina Wald | ||
Image:Operation Flashpoint (11).jpg|Illustration by Christina Wald | Image:Operation Flashpoint (11).jpg|Illustration by Christina Wald | ||
| Line 22: | Line 22: | ||
Image:Operation Flashpoint (21).jpg|Illustration by Storn Cook | Image:Operation Flashpoint (21).jpg|Illustration by Storn Cook | ||
Image:Operation Flashpoint (22).jpg|Illustration by Storn Cook | Image:Operation Flashpoint (22).jpg|Illustration by Storn Cook | ||
| − | Image:Operation Flashpoint (23).jpg|Illustration by | + | Image:Operation Flashpoint (23).jpg|Illustration by Matt Plog |
Image:Operation Flashpoint (24).jpg|Illustration by Storn Cook | Image:Operation Flashpoint (24).jpg|Illustration by Storn Cook | ||
| − | Image:Operation Flashpoint (25).jpg|Illustration by | + | Image:Operation Flashpoint (25).jpg|Illustration by Matt Plog |
Image:Operation Flashpoint (26).jpg|Illustration by Scott James | Image:Operation Flashpoint (26).jpg|Illustration by Scott James | ||
Image:Operation Flashpoint (27).jpg|Illustration by Storn Cook | Image:Operation Flashpoint (27).jpg|Illustration by Storn Cook | ||
| − | Image:Operation Flashpoint (28).jpg|Illustration by | + | Image:Operation Flashpoint (28).jpg|Illustration by unknown artist |
| + | Image:Operation_Flashpoint_(29).jpg|Illustration by Storn Cook | ||
</gallery> | </gallery> | ||
| − | |||
[[Category:Galleries]] | [[Category:Galleries]] | ||
Latest revision as of 20:06, 15 March 2017
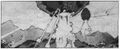
Illustration by Storn Cook
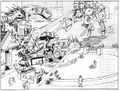
Illustration by Matthew Plog
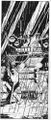
Illustration by Matthew Plog
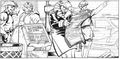
Illustration by Matthew Plog
Illustration by Matthew Plog
Illustration by Matthew Plog
Illustration by Matthew Plog
Illustration by Matthew Plog
Illustration by Christina Wald
Illustration by Christina Wald
Illustration by Christina Wald

Illustration by Christina Wald

Illustration by Brad K. McDevitt
Illustration by Scott James
Illustration by Brad K. McDevitt
Illustration by Brad K. McDevitt
Illustration by Brad K. McDevitt
Illustration by Storn Cook
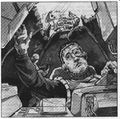
Illustration by Storn Cook
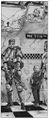
Illustration by Storn Cook
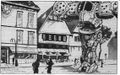
Illustration by Storn Cook
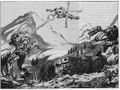
Illustration by Storn Cook
Illustration by Matt Plog
Illustration by Storn Cook
Illustration by Matt Plog
Illustration by Scott James

Illustration by Storn Cook

Illustration by unknown artist
Illustration by Storn Cook
.jpg)
.jpg)
.jpg)
.jpg)
.jpg)
.jpg)
.jpg)
.jpg)
.jpg)
.jpg)
.jpg)
.jpg)
.jpg)
.jpg)
.jpg)
.jpg)
.jpg)
.jpg)
.jpg)
.jpg)
.jpg)
.jpg)
.jpg)
.jpg)
.jpg)
.jpg)
.jpg)