Difference between revisions of "Operation Flashpoint Gallery"
Sarna News

m (...work in progess) |
m |
||
| Line 1: | Line 1: | ||
<gallery> | <gallery> | ||
| − | Image:Operation Flashpoint (1).jpg|Illustration by | + | Image:Operation Flashpoint (1).jpg|Illustration by ?? |
| − | Image:Operation Flashpoint (2).jpg|Illustration by | + | Image:Operation Flashpoint (2).jpg|Illustration by [[Matthew Plog]] '00 |
| − | Image:Operation Flashpoint (3).jpg|Illustration by | + | Image:Operation Flashpoint (3).jpg|Illustration by Matthew Plog '00 |
| − | Image:Operation Flashpoint (4).jpg|Illustration by | + | Image:Operation Flashpoint (4).jpg|Illustration by ?? |
| − | Image:Operation Flashpoint (5).jpg|Illustration by | + | Image:Operation Flashpoint (5).jpg|Illustration by Matthew Plog '00 |
| − | Image:Operation Flashpoint (6).jpg|Illustration by | + | Image:Operation Flashpoint (6).jpg|Illustration by Matthew Plog '00 |
| − | Image:Operation Flashpoint (7).jpg|Illustration by | + | Image:Operation Flashpoint (7).jpg|Illustration by Matthew Plog '00 |
| − | Image:Operation Flashpoint (8).jpg|Illustration by | + | Image:Operation Flashpoint (8).jpg|Illustration by [[Christina Wald]] '00 |
| − | Image:Operation Flashpoint (9).jpg|Illustration by | + | Image:Operation Flashpoint (9).jpg|Illustration by Christina Wald '00 |
| − | Image:Operation Flashpoint (10).jpg|Illustration by | + | Image:Operation Flashpoint (10).jpg|Illustration by Christina Wald '00 |
| − | Image:Operation Flashpoint (11).jpg|Illustration by | + | Image:Operation Flashpoint (11).jpg|Illustration by Christina Wald '00 |
| − | Image:Operation Flashpoint (12).jpg|Illustration by | + | Image:Operation Flashpoint (12).jpg|Illustration by [[Brad K. McDevitt]] '00 |
| − | Image:Operation Flashpoint (13).jpg|Illustration by | + | Image:Operation Flashpoint (13).jpg|Illustration by ?? |
| − | Image:Operation Flashpoint (14).jpg|Illustration by | + | Image:Operation Flashpoint (14).jpg|Illustration by Brad K. McDevitt '00 |
| − | Image:Operation Flashpoint (15).jpg|Illustration by | + | Image:Operation Flashpoint (15).jpg|Illustration by Brad K. McDevitt '00 |
| − | Image:Operation Flashpoint (16).jpg|Illustration by | + | Image:Operation Flashpoint (16).jpg|Illustration by Brad K. McDevitt '00 |
| − | Image:Operation Flashpoint (17).jpg|Illustration by | + | Image:Operation Flashpoint (17).jpg|Illustration by [[Storn Cook]] |
| − | Image:Operation Flashpoint (18).jpg|Illustration by | + | Image:Operation Flashpoint (18).jpg|Illustration by Storn Cook |
| − | Image:Operation Flashpoint (19).jpg|Illustration by | + | Image:Operation Flashpoint (19).jpg|Illustration by Storn Cook |
| − | Image:Operation Flashpoint (20).jpg|Illustration by | + | Image:Operation Flashpoint (20).jpg|Illustration by Storn Cook |
| + | Image:Operation Flashpoint (21).jpg|Illustration by Storn Cook | ||
| + | Image:Operation Flashpoint (22).jpg|Illustration by ?? | ||
| + | Image:Operation Flashpoint (23).jpg|Illustration by Storn Cook | ||
| + | Image:Operation Flashpoint (24).jpg|Illustration by ?? | ||
| + | Image:Operation Flashpoint (25).jpg|Illustration by Scott James | ||
| + | Image:Operation Flashpoint (26).jpg|Illustration by ?? | ||
| + | Image:Operation Flashpoint (27).jpg|Illustration by ?? | ||
| + | Image:Operation Flashpoint (28).jpg|Illustration by ?? | ||
</gallery> | </gallery> | ||
[[Category:Galleries]] | [[Category:Galleries]] | ||
Revision as of 09:32, 13 April 2010
Illustration by ??
Illustration by Matthew Plog '00
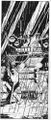
Illustration by Matthew Plog '00
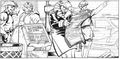
Illustration by ??
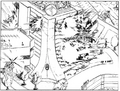
Illustration by Matthew Plog '00
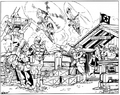
Illustration by Matthew Plog '00
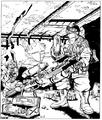
Illustration by Matthew Plog '00
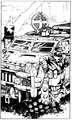
Illustration by Christina Wald '00
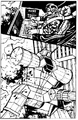
Illustration by Christina Wald '00
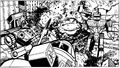
Illustration by Christina Wald '00
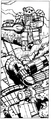
Illustration by Christina Wald '00

Illustration by Brad K. McDevitt '00

Illustration by ??
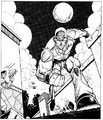
Illustration by Brad K. McDevitt '00
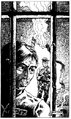
Illustration by Brad K. McDevitt '00
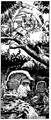
Illustration by Brad K. McDevitt '00
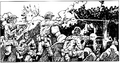
Illustration by Storn Cook
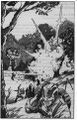
Illustration by Storn Cook
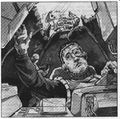
Illustration by Storn Cook
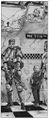
Illustration by Storn Cook
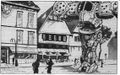
Illustration by Storn Cook
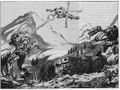
Illustration by ??
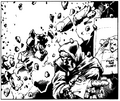
Illustration by Storn Cook
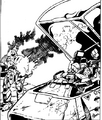
Illustration by ??
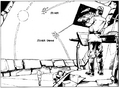
Illustration by Scott James
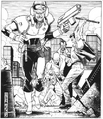
Illustration by ??

Illustration by ??

Illustration by ??
.jpg)
.jpg)
.jpg)
.jpg)
.jpg)
.jpg)
.jpg)
.jpg)
.jpg)
.jpg)
.jpg)
.jpg)
.jpg)
.jpg)
.jpg)
.jpg)
.jpg)
.jpg)
.jpg)
.jpg)
.jpg)
.jpg)
.jpg)
.jpg)
.jpg)
.jpg)