Difference between revisions of "Operation Flashpoint Gallery"
Sarna News


m (Added artist's name credit) |
m (Correcting artist credit.) |
||
| Line 11: | Line 11: | ||
Image:Operation Flashpoint (10).jpg|Illustration by Christina Wald '00 | Image:Operation Flashpoint (10).jpg|Illustration by Christina Wald '00 | ||
Image:Operation Flashpoint (11).jpg|Illustration by Christina Wald '00 | Image:Operation Flashpoint (11).jpg|Illustration by Christina Wald '00 | ||
| − | Image:Operation Flashpoint (12).jpg|Illustration by | + | Image:Operation Flashpoint (12).jpg|Illustration by Christina Wald '00 |
| − | Image:Operation Flashpoint (13).jpg|Illustration by | + | Image:Operation Flashpoint (13).jpg|Illustration by [[Brad K. McDevitt]] '00 |
| − | Image:Operation Flashpoint (14).jpg|Illustration by | + | Image:Operation Flashpoint (14).jpg|Illustration by Scott James |
Image:Operation Flashpoint (15).jpg|Illustration by Brad K. McDevitt '00 | Image:Operation Flashpoint (15).jpg|Illustration by Brad K. McDevitt '00 | ||
Image:Operation Flashpoint (16).jpg|Illustration by Brad K. McDevitt '00 | Image:Operation Flashpoint (16).jpg|Illustration by Brad K. McDevitt '00 | ||
| − | Image:Operation Flashpoint (17).jpg|Illustration by | + | Image:Operation Flashpoint (17).jpg|Illustration by Brad K. McDevitt '00 |
| − | Image:Operation Flashpoint (18).jpg|Illustration by Storn Cook | + | Image:Operation Flashpoint (18).jpg|Illustration by [[Storn Cook]] |
Image:Operation Flashpoint (19).jpg|Illustration by Storn Cook | Image:Operation Flashpoint (19).jpg|Illustration by Storn Cook | ||
Image:Operation Flashpoint (20).jpg|Illustration by Storn Cook | Image:Operation Flashpoint (20).jpg|Illustration by Storn Cook | ||
| Line 23: | Line 23: | ||
Image:Operation Flashpoint (22).jpg|Illustration by ?? | Image:Operation Flashpoint (22).jpg|Illustration by ?? | ||
Image:Operation Flashpoint (23).jpg|Illustration by Storn Cook | Image:Operation Flashpoint (23).jpg|Illustration by Storn Cook | ||
| − | Image:Operation Flashpoint (24).jpg|Illustration by | + | Image:Operation Flashpoint (24).jpg|Illustration by Storn Cook |
Image:Operation Flashpoint (25).jpg|Illustration by Scott James | Image:Operation Flashpoint (25).jpg|Illustration by Scott James | ||
| − | Image:Operation Flashpoint (26).jpg|Illustration by | + | Image:Operation Flashpoint (26).jpg|Illustration by Scott James |
Image:Operation Flashpoint (27).jpg|Illustration by ?? | Image:Operation Flashpoint (27).jpg|Illustration by ?? | ||
Image:Operation Flashpoint (28).jpg|Illustration by ?? | Image:Operation Flashpoint (28).jpg|Illustration by ?? | ||
Revision as of 18:51, 12 March 2017
Illustration by ??
Illustration by Matthew Plog '00
Illustration by Matthew Plog '00
Illustration by Matthew Plog '00
Illustration by Matthew Plog '00
Illustration by Matthew Plog '00
Illustration by Matthew Plog '00
Illustration by Christina Wald '00
Illustration by Christina Wald '00
Illustration by Christina Wald '00
Illustration by Christina Wald '00

Illustration by Christina Wald '00

Illustration by Brad K. McDevitt '00
Illustration by Scott James
Illustration by Brad K. McDevitt '00
Illustration by Brad K. McDevitt '00
Illustration by Brad K. McDevitt '00
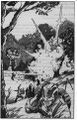
Illustration by Storn Cook
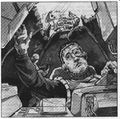
Illustration by Storn Cook
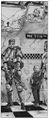
Illustration by Storn Cook
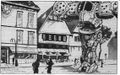
Illustration by Storn Cook
Illustration by ??
Illustration by Storn Cook
Illustration by Storn Cook
Illustration by Scott James
Illustration by Scott James

Illustration by ??

Illustration by ??
.jpg)
.jpg)
.jpg)
.jpg)
.jpg)
.jpg)
.jpg)
.jpg)
.jpg)
.jpg)
.jpg)
.jpg)
.jpg)
.jpg)
.jpg)
.jpg)
.jpg)
.jpg)
.jpg)
.jpg)
.jpg)
.jpg)
.jpg)
.jpg)
.jpg)
.jpg)