Federated Freemen
Sarna News
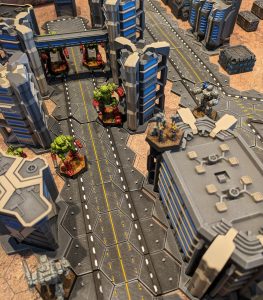
- HEXTECH Review - Wave 3 Brings More Urban Options To Your Battlefield
- Your BattleTech News Round-Up For March, 2024
- Crashing 'Mechs With Jennifer Brozek, Author Of The Rogue Academy Trilogy
- Getting The Word Out With Rem Alternis, Catalyst Community & Marketing Director
- Bad 'Mechs - Yeoman
- Read more →


| |
| Federated Freemen | |
| Formed | 3047[1] |
| Disbanded | By 3079[2] |
| Affiliation | Mercenary |
| Parent Command | Independent |
Contents
History[edit]
Formed in 3047 by retired Lieutenant Colonel Xavier Pelt[1], an officer with a distinguished career within the Davion Brigade of Guards,[3] the Federated Freemen were inspired by another notable mercenary unit, The Arcadians, who began in a similar fashion. The Federated Freemen initially recruited former Armed Forces of the Federated Suns personnel and others discontented with the formation of the Armed Forces of the Federated Commonwealth,[1] Colonel Pelt led the first battalion of Freemen to form up on a number of high-risk assignments while other officers from the Freemen continued recruiting. Having reached a regiment in size by recruiting like-minded individuals who shared similar ideals,[3] the Federated Freemen were employed initially in a number of high-profile garrison postings in the former Federated Suns region of the Federated Commonwealth for the duration of the Clan Invasion.[1]
Following the Truce of Tukayyid the Federated Freemen found further employment as garrison forces for defense industry sites within the Federated Commonwealth, serving in each of the Marches of the former Federated Suns;[1][3] the Freemen were then involved in heavy combat during the Capellan-St. Ives War, taking significant damage as they fought to defend the independence of the St. Ives Compact. The Federated Freemen were pulled out of the Compact when the FedCom Civil War erupted, and were redeployed to the Capellan March world of Monhegan to rebuild. Duke George Hasek II refused to allow the Federated Freemen to join in any of the open fighting between factions within the Civil War; he instead assigned them to various police actions within the Capellan March, before reassigning them to Gallitzin after the end of the war.[1]
Gallitzin was the beginning of a frustrating period for the Freemen; the unit was promised a high-priority position on the supply lists within the official supply system, but they received almost no supplies or new equipment. Colonel Pelt managed to obtain enough equipment to boost the size of the Freemen to almost two full regiments, but the bulk of the equipment was obtained through his contacts in the defense industry, rather than the AFFS supply chain. When the Jihad began in late 3067 the Freemen were left waiting on Gallitzin as news arrived of the Word of Blake invasion of New Avalon, and rumors soon began circulating that the Freemen would be assigned to a relief force intended to lift the siege.[1]
When orders for the deployment of the Freemen finally came from Duke Hasek, the orders weren't for an attack on the Blakists - instead, the Freemen were assigned to Operation SOVEREIGN JUSTICE, one of a number of mercenary units pulled into Duke Hasek's invasion of the Capellan Confederation, and were being redeployed to Kittery. July 3068 saw the Freemen and various other mercenary units assault the Capellan world of Gei-Fu, where the Freemen were responsible for capturing the huge petroleum operation run by Capolla Oil on the northern continent of Gei-Fu, opposed by elements of the planetary militia. Taking little by way of losses during that operation, the Freemen acted as a garrison while salvage and recovery operations began, most notably the removal of eighty million barrels of oil as liquid cargo aboard three massive Mammoth-class DropShips.[1]
The next combat action for the Freemen was the assault on Glasgow as a part of the third wave of SOVEREIGN JUSTICE. Initially facing little by way of opposition, the Freemen were quickly the recipients of attacks and harassment by local resistance cells using asymmetric tactics such as car bombs and sniper attacks to whittle away at the Freemen, claiming at least one senior officer - Major Veronica El Tarkh, CO of the First Freemen Auxiliary. The Freemen fortified their compound while Colonel Pelt petitioned for relief and replacement forces to allow the Freemen to conduct offensive operations - and preserve the morale of the Freemen in the face of local hostility - but received no support. Matters turned sharply on the 10th of October 3068 when the Fourth Tau Ceti Rangers arrived and assaulted the Freemen, launching an extensive battle in and around Edinburgh. The battle extended into the local spaceport and devastated both the Rangers and the Freemen, as well as laying waste to almost a third of the city.[1]
Faced with mounting losses and a lack of ammunition and spare parts, the Freemen began withdrawing to MacClellan Farm to rendezvous with their DropShips and withdraw, with the First Freemen Auxiliary fighting a rearguard action that saw the Auxiliary sell themselves dearly to hold off the Capellan forces while the remaining Freemen boarded DropShips; by the time the Freemen were ready to leave, the First Freemen Auxiliary had been reduced to just a single pair of Manticore heavy tanks. The Capellan forces launched artillery barrages against the DropShips and mounted a devastating airstrike, destroying two of the Freemen's Union-class DropShips.[1]
Too battered to continue fighting, the Freemen were withdrawn to Spica, but once again found themselves getting little or no support from the AFFS quartermaster's department. Barely battleworthy as a formation when the First Janissary Brigade assaulted Spica in March 3069, the Freemen were quickly worn down by the Capellans. Colonel Pelt tried several different feints in the hope of pulling the Brigade out of formation, but the Brigade didn't fall for the various ploys; enjoying complete aerial supremacy, the Brigade simply swarmed the Freemen in conjunction with devastating low-level attacks by VTOLs and MechBusters that ground the Freemen down inexorably. Colonel Pelt was killed on the 30th of April, and with the loss of the Colonel the surviving elements of the Freemen negotiated a peaceful withdrawal - at the cost of several hundred tons of BattleMechs, left behind as salvage.[1]
Following the defeats on Glasgow and Spica the Freemen were withdrawn to Atlas where they received a bare trickle of new supplies and equipment over the following two years and remained a broken, shattered command. By the end of 3071, the new CO of the Freemen, Colonel Groh, was debating disbanding the Freemen, something that some among his command were actively favoring.[1]
By 3079, the Federated Freemen were described as one of ten mercenary commands of note in the employ of the Federated Suns to have been destroyed during the course of the Jihad.[2]
Officers[edit]
| Rank | Name | Command | |
|---|---|---|---|
| Commanding Officers of the Federated Freemen | |||
| Colonel | Xavier Pelt | 3047 - 3069[1] | |
| Colonel | Starling Groh | 3069 - 3072[1] | |
Tactic[edit]
Every battalion was supported by conventional forces and the Freemen preferred mobile warfare.
Dragoon Ratings[edit]
3067[edit]
Dragoon Rating: B
3072[edit]
Dragoon Rating: D[4]
Composition History[edit]
3067[edit]
Federated Freemen (Regiment/Veteran/Reliable)[3]
- CO: Colonel Xavier Pelt
- XO: Lieutenant Colonel Starling Groh
- At this point in time the Federated Freemen were still rebuilding after suffering heavy losses.
First Freemen Auxiliary (Two Battalions/Regular/Reliable)[3]
- CO: Major Veronica El Tarkh
- A full regiment in size prior to the damage taken during their police actions in the FedCom Civil War, the two surviving battalions consist of heavy and assault tanks in the first battalion; the second battalion had recently been rebuilt from the ground up and fielded mainly fast hovertanks.
The Freemen fielded eight DropShips: one Triumph, two Overlords, four Unions and a single Mule, and enjoyed full technical support.
3072[edit]
Federated Freemen (Two mixed companies)
- CO: Colonel Starling Groh
- By this point the Federated Freemen were no longer considered a combat-ready formation. The total strength of the Freemen stood at two mixed companies of 'Mechs and combat vehicles, with only two of those 'Mechs in pristine condition; if faced by an opposing force, the lack of battle plans and cohesive doctrine would likely break the Freemen immediately.
Color Scheme[edit]
The Freemen use Davion green with a blue trim, with their right arm being painted in the colors of the individual's former unit they belong to as a part of their AFFS/AFFC past. This is meant to show that they are the strong right arm of the Federated Suns.[5]
References[edit]
- ↑ 1.00 1.01 1.02 1.03 1.04 1.05 1.06 1.07 1.08 1.09 1.10 1.11 1.12 1.13 Mercenaries Supplemental Update, p. 52: "Federated Freemen"
- ↑ 2.0 2.1 Field Report: AFFS, p. 20: "Mercenaries"
- ↑ 3.0 3.1 3.2 3.3 3.4 Field Manual: Mercenaries, Revised, p. 66: "Federated Freemen: Swordsmen of the Suns"
- ↑ Mercenaries Supplemental Update, p. 124: "Federated Freemen (D)"
- ↑ Field Manual: Mercenaries, Revised, p. 66