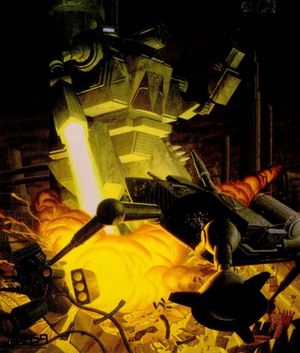
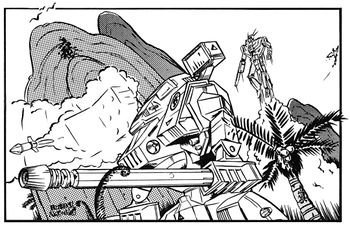
Delta Regiment (Wolf's Dragoons)
This article needs to be updated with material from Hector (short story), Era Report: 3052, More Tales of the Black Widow, Making a Name. Once these titles clear the Moratorium period, or if they already have, please consider revisiting this article and updating it with the new material. |
| |
| Delta Regiment | |
| Formed | 3004 |
| Nickname | The Gray Wolves (3067) [1] |
| Affiliation | Mercenary |
| Parent Command | Wolf's Dragoons |
Wolf's Dragoons' Delta Regiment (later sometimes known as Delta Brigade) was an elite mercenary formation. As one of the five front-line regiments of the famous Wolf's Dragoons, they were counted among the most prestigious units in the Inner Sphere for over six decades of service.
Contents
- 1 Overview
- 2 History
- 3 Officers
- 4 Tactics
- 5 Composition History
- 6 Insignia and Color Scheme
- 7 Notes
- 8 References
- 9 Bibliography
Overview[edit]
Delta Regiment has been part of some of the Dragoons' most impressive victories and devastating setbacks over the course of their history. From their victory on Halloran V in the first major battle the Dragoons ever fought, to the death of Colonel Travis King on New Aragon, to their service in the Marik Civil War, to their actions on Misery and during the Fourth Succession War, all the way to their clashes against Clan Jade Falcon during the historic Battle of Coventry, Delta has seen more than its share of heavy fighting, participating in some of the largest battles of the thirty-first century.[1] Through it all and no matter what the odds, the Deltas always fought on, bending but refusing to break. Delta would be the last of the original Dragoon regiments to remain in service, finally meeting their end in 3070 during the Jihad.
History[edit]
In service to Davion[edit]
Halloran V[edit]
They first saw action on the Capellan world of Halloran V, which was being used to raid Davion worlds by Marion's Highlanders and the Blackwind Lancers. Delta accompanied Beta Regiment, Gamma Regiment and Zeta Battalion as well as the Seventh Kommando special forces unit, all under the overall command of Colonel Jaime Wolf.[2] The Dragoons achieved total surprise in their initial attacks, forcing the Liao troops to abandon their main base and falling back to the city of Gethin. Delta Regiment held the Dragoons' right flank, putting pressure on the Lancers in Gethin and allowing the other Dragoon units to focus on the Highlanders north of the city. Delta's goal was not only to prevent the Lancers from regrouping with the Highlanders, but to also keep them from reaching the planet's ComStar facility where they could call for reinforcements. This proved the critical point of the early battle, as Colonel King's conservative, combined-arms tactics succeeded in pinning the Lancers. Beginning with a heavy aerospace fighter bombardment, Delta slowly advanced with King sending his heavy and assault lances into the suburbs, where they overcame resistance in the form of artillery emplacements and defending UrbanMechs. Once he had secured the city's outskirts, King consolidated his position, repairing and resupplying his units while preparing for a major push the following day. The Lancers used the opportunity to launch a counterattack, beginning with infantry armed with Inferno missiles, followed up with BattleMech attacks. They managed to get surprise on Delta's recon pickets, destroying a number of 'Mechs and causing much confusion. King calmly and stoically pulled his forces back to regroup, and when the Lancers attempted to capitalize on their momentum, it was the Dragoons turn to surprise their enemy, using their artillery units and 'Mech attacks to smash the Liao vanguard. When the Lancers attempted to fall back, elements of the Seventh Kommando surprised them from behind with portable SRM attacks. The Lancer 'Mechs took serious damage and half their infantry never made it home.[3] Two days later, Delta initiated a plan by King and the Seventh Kommando to flush the Blackwind Lancers out of the city. Using another artillery barrage, Delta covered for the Seventh Kommando, who stealthily took position behind the Lancers. When Delta advanced, the Lancers began receiving reports of a large enemy force behind them, possibly in regimental strength. These false reports by the Kommando caused the Lancers to panic, abandoning their defensive positions as they attempted to regroup with the Highlanders. The Delta's chased the Lancers into the valley where their sudden presence threw the Highlanders, still holding against Beta and Gamma Regiments, into confusion. By the time the Liao troops broke out of the ambush, they'd been severely mauled. When Capellan reinforcements arrived, it was all they could do to help the two regiments retreat. The entire battle had taken only five days, with Delta Regiment receiving the bulk of the credit for the victory.[4]
Other Operations[edit]
In January 3007, Delta Regiment was on New Valencia along with Gamma and Epsilon Regiments when all five regiments of McCarron's Armored Cavalry attacked. Under the overall command of Gamma commander Wilhelmina Korsht, the Dragoons quickly evacuated their dependents to their base at Fort Jaime, then began using their support battalions to set up a defensive screen. The Liao mercenaries soon besieged the Dragoons at Fort Jaime while taking control of the city of Raiteland, where they caused widespread havoc, destroying several civilian buildings. Despite all this, the three Dragoon regiments held Fort Jaime, turning back multiple attacks with great determination. As the days passed, word came that all three regiments of the Eridani Light Horse were on their way to New Valencia to reinforce the Dragoons. At risk of being trapped and destroyed, Colonel Archibald McCarron reluctantly ordered a retreat.[5] In September 3007, Delta and Gamma Regiment raided New Hati in the Tortuga Dominions where a large nest of pirates were based who had been plaguing Davion worlds. The Deltas methodically wore down the defenders while Gamma Regiment encircled them. The pirates took heavy losses in escaping, discouraging them from launching further attacks on the Federated Suns.[6]
New Aragon and Departure[edit]
In March 3008, Delta Regiment and nearly the entire Dragoons command took part in the battle of New Aragon, recently taken from House Davion by the Capellans. The invading force consisted of all five regiments plus Zeta Battalion, in addition to five top Davion regiments. Defending the planet were eight entrenched Liao regiments, including elements of the elite Northwind Highlanders brigade. Almost immediately, things went poorly for the Dragoons and their Davion allies. The 4th Deneb Light Cavalry, temporarily attached to the Dragoons, lost nearly an entire battalion of 'Mechs when one of their DropShips was shot down by Capellan aerospace fighters. This kept them out of the fighting for almost a week. Delta Regiment repeatedly attempted to assault the Liao position in the Estacado Mountains, only to be repulsed by the tenacious defense of the 1st and 2nd Kearny Highlanders.[7] Ordered to attack for the fifth time, King called in an artillery strike, then led his heavy 'Mechs into battle once again. Taking heavy damage, the conservative King ordered a retreat, only to face a furious bombing attack from heavy aerospace fighters. King called in Dragoon aerospace support, but the minutes it took them to arrive proved critical. King's Archer was hit in the rear a freak shot, breaching the 'Mech's armor and causing his ammunition to explode. King was killed instantly, becoming the first Dragoon regimental commander to be killed in action.[8] King's second-in-command, Sarah Weisz, would succeed him.[9]
Weisz quickly worked to rebuild Delta's shaken morale, soon establishing herself as a strong commander.[9] In 3009, Delta accompanied the rest of the Dragoons back to the Clan Homeworlds to report on the Inner Sphere, an operation that took ten months.[10]
In service to Liao[edit]
In mid-3010, the Dragoons entered the service of House Liao, based on the Capellan border with the Free Worlds League. In March 3011, Delta saw their first major action in service to their new employer, defending Wallacia against the Free Worlds League Military. Employing the innovative tactics for which she became known, Colonel Weisz and Delta Regiment successfully held off three Marik regiments with a mobile defense while Gamma and Epsilon Regiments raided the enemy's rear, destroying supplies and crippling transports. Although effective for a time, FWLM reinforcements soon forced the Dragoons to retreat. On Scarborough, the three Dragoon regiments again formed the centerpiece of the defending forces against the Marik invaders. Better prepared for the Dragoon tactics, the FWLM regiments forced the mercenaries into compromising positions, with Delta and Epsilon pinned along the Fielder River. The situation was only rectified when Epsilon's Colonel Harold Jones linked up with Delta, and the two regiments formed an effective, if tight, perimeter. However with Gamma's position badly compromised, the Dragoons were again forced to retreat.[11]
The Marik offensive was finally halted on Shiro III, where several Dragoon units, including Delta, fought with distinction. It was on Shiro III that Colonel Weisz first became known as "The Ghost" for her hit-and-run tactics, with Delta and the Dragoons becoming feared among the Marik forces.[12] Afterwards and through the remainder of 3013, Delta and most of the Dragoons settled into a standard garrison duty assignment on Carver at the order of the Capellan high command.[13]
Marik Civil War[edit]
In early 3014, Capellan Chancellor Maximilian Liao struck a deal with Duke Anton Marik, brother of Captain-General Janos Marik, to support Anton's bid for his brother's throne. As part of this agreement, Liao allowed the Dragoons to sign a contract with Anton Marik. On 22 May, 3014, Duke Anton publicly made his claim, triggering the Marik Civil War.[14]
Delta Regiment was held in reserve through the opening months of the conflict, remaining based on New Delos from May through August of 3014.[15][16] In September, they were finally deployed to Sophie's World, alongside the 3rd Marik Militia and Epsilon Regiment. Defending the planet were the 1st Atrean Dragoons, the understrength 6th Marik Militia, the mercenary Head Hunters and three conventional regiments. Janos Marik had hoped to use Sophie's World to blunt Anton's advance, while his brother simply deployed his reserves to take it while Task Force Eagle moved on. The rebels, who were in fact outnumbered, faced continuous hit-and-run attacks almost from the moment they arrived on Sophie's World, and the battle took much longer than Anton Marik may have hoped.[17] In October, Colonel Jaime Wolf diverted Alpha Regiment to draw the fighting on Sophie's World to a close. Delta Regiment coordinated with the incoming Alphas, trapping the Atrean Dragoons between the two elite regiments. The loyalists, realizing the danger, attempted to break through Alpha to escape, only to face devastating fire from Major Kelly Yukinov and Alpha's Able Battalion. As they regrouped for another charge, Weisz and Delta pounced on the loyalists from behind, destroying the Atrean Dragoons and taking many prisoners. The remaining loyalist units quickly retreated off-world.[18][19] Overall casualties to Delta Regiment on Sophie's World were light.[16]
In November, Delta invaded Kyeinnisan. Facing no opposition, they took another world for the rebels.[16][20] December saw Delta rotated to Emris IV alongside Epsilon Regiment, where in January 3015 they beat back a raid by the 2nd Fusiliers of Oriente, inflicting heavy losses on the loyalists. Losses to Delta were light.[16][21] Delta was briefly rotated back to New Delos in March[16] before joining Alpha, Beta and Gamma Regiments, as well as Zeta Battalion, Kerensky's Company and the Fire Support Group in April to drive the 1st and 2nd Regulan Hussars off McKenna. Heavy losses were inflicted on the retreating loyalists while the Dragoons took only light casualties.[21][22]
Despite their early successes, the conflict soon turned against the Rebels as the Loyalists rallied. When Duke Anton demanded that Wolf break up his forces to supplement Anton's troops, Wolf refused, citing their contract. In retaliation, Anton arrested Liaison Officer Joshua Wolf, Wolf's brother and second-in-command, and 27 Dragoon dependents on New Delos, keeping them as hostages and demanding Wolf comply.[23][24]
Instead, Wolf led his forces back to attack New Delos en masse. The Dragoons, including Delta Regiment, fell upon Duke Anton's stronghold, despite the Duke's claims that Joshua Wolf and the other civilians had already been executed. Defending Duke Anton were surviving elements of the 18th Marik Militia and the remains of the 1st, 2nd and the 5th Ducal Guard. The Dragoons fought with unprecedented fury; with Delta assigned to secure the spaceport, where elements of the First Ducal Guard quickly began fleeing the planet. They were the only rebels to survive the apocalypse, as in three days the Dragoons completely destroyed Anton Marik's support base as well as the Duke himself. The war was, effectively, over.[24][25] Delta's losses on New Delos were moderate.[22]
In service to Marik[edit]
The Dragoons soon came into the employ of their former adversary, Captain-General Janos Marik. Weisz and Delta Regiment became prominent in these "cattle-raiding" years, engaging in a series of raids against House Steiner. In one such exchange in 3016, Delta and Beta Regiments attacked the world of Wyatt, defended by the elite 11th Lyran Guards and the 17th Arcturan Guards. The Dragoons engaged the Lyrans in a deadly game of hide-and-seek, with Weisz once again demonstrating why she was called "the Ghost". Nevertheless, the Lyran defenders were familiar with their home terrain, and they soon had the Dragoons on the defensive. When the Dragoon DropShips landed to extract the two regiments, Lyran aerospace fighters plagued them on their descent, inflicting significant damage. One of Beta's DropShips was destroyed while lifting up, leading to the destruction of an entire battalion.[26]
The Thirteenth Battle of Hesperus[edit]
In 3019, they would begin the boldest campaign of their history to that point: The capture of Hesperus II, home of Defiance Industries, the largest BattleMech factory in existence which had held out successfully against twelve major campaigns to take or destroy it, and which was the foundation for the Lyran Commonwealth Armed Forces entire military industry. In a series of raids, the Dragoons made their way through Lyran space, keeping House Steiner off-guard with their seeming odd choice of targets.[27]
Unfortunately for the Dragoons, a spy in the Marik court had revealed to the Lyrans the Dragoons ultimate target.[28] Hesperus II had been reinforced, and the Dragoons now faced the 6th, 15th and 24th Lyran Guards, the 3rd Royal Guards and the mercenary Hsien Hotheads and Hansen's Roughriders. The Thirteenth Battle for Hesperus would be a brutal campaign, as the Dragoons faced far greater opposition than predicted. Delta and Epsilon Regiments were initially held in reserve. When the three attacking regiments were scattered under heavy attack, Colonel Wolf was forced to call in half his reserves, ordering Colonel Weisz and Delta to drop behind the enemy formation. Heavy aerospace resistance, however, led to the rendering of 20 percent of Delta's 'Mechs as combat ineffective before they even landed on-planet. Despite the damage, Weisz rallied her troops to attack the enemy's rear, buying the rest of the Dragoons time to regroup.[29][30]
The campaign did not go well for the Dragoons over the course of several days, as every drive towards the factories was inevitably driven back by the determined Lyran defenders. It was Natasha Kerensky, the Black Widow, who proposed a solution, using a narrow passage through the mountains called Tanda's Crossing that was only lightly defended to reach the factories.[31][30] Her Black Widow Company would form the tip of the Dragoon spear, with Delta and Epsilon Regiments following up. The beginning of the operation went well, as Delta and Epsilon drove a massive breach into the Lyran lines.[32] The Lyran commander realized the danger to the factories, and dispatched Hansen's Roughriders to stop the Dragoons. The Black Widow Company came into range of the Defiance Industries plant when they were attacked by the defending Roughriders. Badly outnumbered, the Widows were forced to retreat and not even the arrival of Delta and Epsilon could not dislodge the Roughriders, and within a few hours the Lyran lines had stabilized. Out of supplies and with major casualties, Wolf ordered a retreat, and the Dragoons were forced to return to Marik space.[33][30]
In service to Steiner[edit]
In Spring 3020, Wolf's Dragoons entered the Lyran Commonwealth's service, in part due to their impressive performance on Hesperus. Colonel Weisz elected to retire, much to the disappointment of her troops. At her suggestion, Major Kathleen Dumont was chosen to succeed her. This was likewise viewed with disapproval by Delta's rank and file, many of whom favored Major Benjamin Schwartzkopf for the command.[34]
The concerns of many of Dumont's doubters seemed vindicated in Delta's first major action under her command. House Kurita had been moving units to the key border world of Dromini VI, preparing for a renewed assault on Lyran Commonwealth, the Dragoons' current employers. Archon Katrina Steiner decided a preemptive strike was called for, and in September 3021, Alpha, Delta and Epsilon Regiments, along with three regiments of the Donegal Guards as a reserve, assaulted Dromini, expecting to find it defended only by the 3rd and 22nd Dieron Regulars. Unknown to the mercenaries and their Lyran allies, the elite 2nd Sword of Light was also on-planet. Although Delta was intended to hold back during the initial assault, Dumont took the initiative of attacking the city of Draschau. Expecting little resistance, Dumont failed to adequately scout the city, and soon faced an ambush by the Second Sword. Rather than pullback to reassess the situation, Dumont elected to launch a frontal assault, taking heavy losses. Although technically successful in dislodging the Second Sworders, it was a pyrrhic victory at best, and earned her not only unpopularity with her soldiers but a reprimand from Colonel Wolf. Dumont vowed to recover from this setback.[35]
In service to Kurita[edit]
Raid on Quentin[edit]
In early 3023, the Dragoons left House Steiner's service, signing on with the Draconis Combine. As they traveled across the Combine, Colonel Wolf took Alpha, Gamma and Delta Regiments to strike at House Davion on the industrial world of Quentin IV in June.[36] Colonel Wolf himself commanded the Dragoon task force, implementing a bold strategy. The Dragoons would feign an attack on Port Gailfry, draw the AFFS troops out, then turn and attack their true target, the underdefended Independence Weaponry factory at Fasolht.[37]
While most of Gamma Regiment was held in reserve, elements of Delta Regiment quickly set up around Port Gailfry.[38] After Dumont, Wolf and the other senior officers met their DCMS liaison officer, Minobu Tetsuhara, for the first time,[39] Dumont left to supervise Delta's continued harassment of Port Gailfry, leaving Wolf, Major Kelly Yukinov and Colonel Andrei Shostokovitch in charge of Alpha and the main force moving in the targeted factories.[40] The defending Snake Stompers mercenary company attempted to push back into the Dragoons, temporarily stalling Alpha Regiment's offensive and injuring Colonel Wolf.[37][41] Although Dumont's diversionary attack on the Port was successful overall, the mercenary White Witches managed to fight through Delta's screen and moved to reinforce the rest of the Davion troops.[42] Delta's Able Battalion stabilized the Dragoons' lines, averting a potential catastrophe.[43] At one point, however, the Dragoons intended to call in Gamma Regiment to perform a combat drop on the Davion mercenaries before the Sword of Light officers, nominally on-planet to escort Coordinator Takashi Kurita, volunteered to perform a frontal assault.[42] Nevertheless, the rest of the operation went well, and it would go down as a stunning opening success for the Dragoons.
Quentin became the turning point that Dumont and Delta Regiment desperately needed, restoring confidence in the Colonel's command. In the years that followed, they would continue to build on that success, once again becoming an elite, highly motivated formation.[44]
Troubled Times[edit]
As of 3025, Delta Regiment was primarily stationed on Capra on the Davion border, alongside Alpha Regiment.[45] They and other Dragoon units continued to plague the Federated Suns on various raiding operations, including serving with distinction on Bergman's Planet[46] and Udibi[47] as well as defending against a raid on Proserpina.[48]
In August 3027, when Warlord Grieg Samsonov demanded the Dragoons be placed under his direct control, among his other demands were that Dumont be removed from command, as he objected to women holding such positions of power.[49][50]
Misery[edit]
In January 3028, relations between the Combine and the Dragoons exploded on An Ting into open violence. Although most of Delta Regiment was not present, the course of the Dragoons was now clear.[51] In April 3028, Delta Regiment joined the rest of the Dragoon units on Misery. All five Dragoon regiments, along with Zeta Battalion and the Black Widow Company, would face off against the Ryuken, now built up to four regiments, along with the 17th Galedon Regulars, the 21st Galedon Regulars, and the elite 8th Sword of Light, all commanded by newly promoted Tai-sho Minobu Tetsuhara, who knew the Dragoons and Jaime Wolf better than anyone outside the mercenary command.[52][53]
The Battle of Misery proved to be one of the largest, most bloody 'Mech battles in history, with neither side giving any quarter.[54] Delta's Able Battalion, in particular, distinguished themselves, as "The Landsknechts" destroyed an entire Ryuken battalion.[55] On 14 May, Delta's Baker battalion: "The Specters", attempted a strike on a Ryuken mustering point in the Trolfjel Highlands when they ran into a blocking force, a battalion from the Seventeenth Galedon. The Specters decided to push their way through the "Protectors of Karma". The Deltas made significant headway until another company of the Seventeenth attacked their flank.[56] Abandoning their original objective, the Dragoons attempted to defeat the Kuritan force despite being outnumbered 3:2.[57] Although technically successful, most of the battalion was lost in the action.[56][58] Both units took some of the heaviest losses of any Dragoon battalions, however Charlie Battalion was mostly held in reserve during the campaign, as their commanding officer, Major Neil Parella, had suffered from alcoholism for an extended period, and this compelled Colonel Dumont and Colonel Wolf to hold them out of much of the fighting, resulting in relatively minor casualties.[59] This would have unintended consequences, as Charlie Battalion's officers were so disgusted at their role on Misery that two company commanders and the battalion's XO would all retire or resign after the battle.[60]
The Dragoons as a whole ultimately emerged victorious from the campaign, though overall losses were staggering, with many units losing over 50 percent combat effectiveness.[54] Delta Regiment was reorganized into four provisional companies after Misery, with most of their conventional elements transferred to protect their Dragoon dependents.[61]
The Fourth Succession War[edit]
Wapakoneta[edit]
When the Fourth Succession War broke out, Delta Regiment defended the Federated Suns world of Wapakoneta alongside Beta Regiment. Attacking the planet were Kurita's 3rd Proserpina Hussars and 12th Galedon Regulars, landing on-planet September 17, 3028. Colonel Dumont and Beta commander Andrei Shostokovitch emerged with a strategy that would take advantage of Wapakoneta's small land area, using a guerrilla warfare defense with hidden supply depots. The Dragoons had familiarized themselves as much as possible with the terrain, and were well prepared to defend the continent of New Wisconsin. Early in the campaign, Beta's Third Provisional Company managed to destroy two-thirds of the Kuritan aerospace fighters on the ground, but were themselves annihilated by the overwhelming force of the two DCMS regiments.[62][63]
Sometime later, Delta Regiment's Second Provisional Company, led by Captain Ralph Kincaid, attempted to draw two enemy lances into a kill zone in a clash that became known as the Battle of the Black Statues. Caught in a forest fire that burned out of control, Dumont ordered Kincaid to pull out. Kincaid, who had lost his wife and son on Misery, ordered the rest of his company to retreat while refusing to withdraw himself. Two of his warriors remained with him, though they were hopelessly outnumbered and faced the dangers of the fire. Kincaid died in his cockpit fighting to the bitter end, destroying most of the remaining Combine 'Mechs.[62][63][64] Kincaid's stand became such a legend among both the Dragoons and the Kuritans that the invaders would leave the ruined husk of Kincaid's Thunderbolt standing as a memorial, its hand reaching out to "choke" the head of a Galedon Panther.[65] Years later the Dragoons would create the "Kincaid" Honorname in the Captain's memory, producing trueborn warriors using Ralph Kincaid's genetic material.[66]
In the months that followed, the Dragoons split into company and lance-sized units, refusing to give the Kuritans a pitched battle that would allow them to take advantage of their superior numbers. This approach was effective in the forests and mountains, but less so in the flat plains. The Dragoons' efforts were helped that the Combine commander, Sho-sho Tarsus Bodoli, kept his forces on the main roads in tightly packed convoys, easy prey for small groups of Dragoons. The Proserpina Hussars and their commanding officer, Sho-sho Bruce Lee Bernstein, grew frustrated at this ineffective approach, eventually splitting off his regiment and breaking it into company-sized units. This proved effective when a light company of Hussars trapped Beta Regiment's Fourth Provisional Company near Stiverson City when the latter had been attempting to ambush a company of the Galedon Regulars. Only five Dragoons escaped, and it seemed to become a turning point in the campaign, as the Dragoons were forced to retreat more and more in the wake of these new tactics. Both Dragoon Colonels recognized that a change in approach was called for or they would be destroyed one company at a time. They successfully used Beta's Fifth Provisional Company to lure a battalion of the Hussars into a massive ambush, where almost the entirety of the remaining Dragoons attacked. Known as the Fight of Ploven's Fields, Dumont activated a minefield beneath the Hussars, and a dozen Kuritan 'Mechs were destroyed before they managed to withdraw. The Hussars regrouped with the Galedon Regulars, looking to rest and repair.[62][63][67]
The Dragoons, meanwhile, had decided to make a stand at the city of Hannibal. While pushing towards that city, however, they were blocked by elements of the Twelfth Galedon, who had taken the key town of Bakir, through which the only bridge to cross the Bakir River went through. The Regulars were well-entrenched, with artillery and aerospace fighter support. With the battle not going well, Dumont was approached in her 'Mech by an elderly woman, Mavis Greenthorn, who had been an AFFS veteran and who had braved the battlefield to give the Dragoon Colonel information about the terrain to help the mercenaries prevail. Showing Dumont a hidden location where the river was shallow enough for 'Mechs to safely cross, the Colonel led the remaining Dragoons across the river, then doubled back to Bakir, where they surprised the Kuritans from behind. The Regulars quickly withdrew, and the Dragoons would blow the bridge, buying themselves a month worth of time while the Kuritans found a way around the river. Reaching Hannibal was not without cost, however, as Beta's Fifth Provisional Company was intercepted by a superior force. Facing two-to-one odds, Rondema's Roughnecks were destroyed, further reducing the Dragoons' numbers. Evacuating the civilian population of the city, the Dragoons had until late April to prepare. After the Kuritans established a secure position outside the city, they began a campaign of bombardment with their remaining aerospace fighters. The Dragoon 'Mechs took cover in the city's vast underground mining facilities, avoiding serious damage while the city above was reduced to rubble. When the Kuritan 'Mechs finally attacked on 9 May, the Dragoons used the rubble as natural defensive positions, and the mercenaries and Wapakoneta militia ambushed their enemies repeatedly. Beta's First Provisional Company was able to pick off two recon lances of Kuritans when they were cut off. The rest of the Dragoons then attacked, destroying several Kuritan 'Mechs and forcing them to pull back. When the DCMS attacked again two weeks later, they did so in lance-sized units. Splitting their remaining forces into three groups, Dumont took her command lance and Delta's Third and Fourth Provisional Companies, attaching the 'Mechs to the underground trains and effectively creating a rapid response force that could strike at the attackers from below. Colonel Dumont's 'Mech and several other heavy machines made this difficult, however, as the tunnels had never been designed for their size. Although the Dragoons took losses, they were once again able to push their enemies back. After that, weather made any further attacks impractical for more than a month, as supplies for both sides ran low. Using the winter storms as cover, the Dragoons withdrew through the underground tunnels and reached their DropShips, which they used to escape the planet. Of the nine companies of 'Mechs the Dragoons had started with, only four had survived.[62][63][67]
Crossing[edit]
On Crossing, the Dragoons regrouped. Where once they had fielded five regiments, now they were reduced to one. On September 2, 3029, Kurita DropShips neared Crossing's orbit. The Twelfth Galedon Regulars had followed the Dragoons from Wapakoneta, as had the Fifth, Eighth and 16th Galedon Regulars, units that had fought the other Dragoon regiments on Harrow's Sun and Glenmora. Though all four Galedon Regular regiments had taken heavy losses, they had been reinforced by green recruits fresh out of the academy, bringing them up to strength on paper if not in unit quality. The Kuritans had a four-to-one advantage in numbers and had learned a great deal from their previous battles. They were cautious in their approach, wary of ambushes or traps. They were also accompanied by an elite 'Mech company (designated "Sword of the Void") of the DEST that remained in orbit as a reserve force. With such a numerical advantage, the Combine forces chose not to bring their conventional troops into the battle, deigning such units worthless distractions, fit only to guard their DropShips. Colonel Wolf contacted the invading ships and told them where they would meet them. It was essentially a challenge, but it also served to protect the civilian population of Crossing, which was only lightly defended by the 10th Deneb Light Cavalry soldiers who had pulled off Glenmora with Alpha Regiment.[68][69] During one particularly brutal thrust, a heavy lance from the Eighth Galedon pushed forward and were confronted by just two Delta 'Mechs, a medium and a light.[70] The campaign was long and hard, with the Dragoons making the Galedon Regulars pay for every inch they took in blood. At one point, the DEST team conducted a daring drop in the middle of the Dragoons defense, causing havoc behind the lines. During the fighting, Colonel Dumont's 'Mech was destroyed, taking her out of the combat. Just as it seemed the Dragoons might collapse, elements of the Tenth Deneb would surprise the Galedon Regulars from behind, buying the Dragoons time to recover. It was at this point that Zeta Battalion, having recovered their strength on Robinson, entered the battle, having arrived undetected in rented Mule-class DropShips. As the desperately needed reinforcements fell on the Galedon Regulars, Colonel Wolf and his warriors finally crushed the DEST company, freeing them to turn on the Kuritan forces. Most of the Fifth Galedon was destroyed climbing the mountain wall in an attempt to retreat, and the Sixteenth's survivors were forced to surrender to Natasha Kerensky. The Eighth and Twelfth were routed by the emboldened Dragoons, harassed by Inferno-rocket wielding infantry using the cover of the mountains. They would flee to their transports. Of the four BattleMech regiments that had attacked Crossing, only 112 Kuritan 'Mechs survived. Wolf's Dragoons had been brought to the edge of destruction, but their reputation was greater than ever. An entire Successor State had devoted all its resources to crushing them, yet they still lived. In the aftermath of the Fourth Succession War, Delta Regiment, like virtually every other Dragoon line unit, was effectively inactive, with losses far too high to field a viable command.[68][69][71]
The Long Road to Recovery[edit]
Murchison[edit]
Like most of the Dragoon units, it took many years to rebuild Delta Regiment. Ultimately, Delta would become the second regiment to return to service, coming back online in 3037. In late 3038, Delta received its first major contract, conducting a raid against the Combine world of Murchison. There they met the 22nd Dieron Regulars, a veteran unit that had taken to Theodore Kurita's military reforms and were not intimidated by the reputation of the Dragoons. By using combined-arms tactics, the Regulars routed the Deltas. Brevet-Colonel Bill Paxon took control of the situation, organizing an orderly withdrawal.[1][72] It is presumed that Colonel Dumont was killed during the fighting on Murchison.
War of 3039[edit]
Although Delta was nowhere near at full-strength a year later in 3039 when Hanse Davion launched his offensive against the Combine,[73] Jaime Wolf was nevertheless compelled to include them in a massive Dragoon task force rotated to Caph in preparation for an eventual assault on Dieron.[74] Caph was soon attacked by the rebuilt Ryuken-san and Ryuken-ni regiments, sent by Warlord Michi Noketsuna in the hopes that destroying enough enemy supplies would postpone an attack on the district capital.[74][75] Despite their old hatreds from Misery, the fighting on Caph was somewhat anticlimactic,[74] as the Ryuken managed to evade a trap by the Dragoons and the Davion Assault Guards. The Dragoons took moderate losses overall, and while the Ryuken troops took heavier damage, they were successful in damaging the base of the 33rd Avalon Hussars as well as damaging the 3rd Crucis Lancers before making an orderly withdrawal.[75] Delta, still a provisional regiment, took heavy losses during the fighting, but preserved the unit's integrity.[73] As they had in the past, the Dragoons adopted war orphans on Caph. A nameless three-year-old found in a ruined cathedral by Delta's infantry would be taken in and named Stacy Church by the troopers, and years later would grow into one of the most important officers in the Dragoons.[76]
Shortly thereafter, once further attacks on the Combine had been postponed, Delta and Alpha Regiments were rotated to Hsien, which was under attack by House Marik's 3rd Free Worlds Guards. An insurrection by the civilian population prevented the FWLM troops from securing the planet, and when two Dragoon regiments appeared in orbit, the Third Guards elected to retreat before the Dragoons could even land.[73][77] Delta Regiment returned to Outreach with the rest of the Dragoons after the war.[73]
Retraining with the Widow[edit]
In light of their less than stellar performance on Murchison and Caph, Colonel Wolf chose to rebuild Delta Regiment, this time ensuring the new unit's quality by having their troops undergo training by Natasha Kerensky and her Black Widow Battalion. By the time Delta returned to full active duty in 3045, they were once again considered worthy to be called Dragoons, one of the best mercenary regiments in the Inner Sphere.[72]
Clan Invasion[edit]
When the Clan Invasion finally struck in 3050, Delta and all other Dragoon units were recalled to Outreach. After the Dragoons conferred amongst themselves, Colonel Wolf invited the leaders of the Successor States to Outreach, where he revealed the Dragoons origins, pledged his troops to the defense of the Inner Sphere against the Clans, and began training their leaders and heirs in tactics to defend their beleaguered realms. Delta and the other line regiments were contracted out to the Federated Commonwealth. To the surprise of almost all, Hanse Davion did not send the Dragoons to his own Clan front to oppose the invading Jade Falcons, but rather sent them along with the Kell Hounds to Luthien to help defend the Combine's capital from Clans Smoke Jaguar and Nova Cat. The Dragoons once again fought alongside their old enemy, Takashi Kurita, as well as Theodore and Hohiro Kurita, and Morgan Kell and his Kell Hounds.[78][79] During the titanic struggle in the Kado-guchi Valley, Delta was able to isolate the 145th Jaguar Regulars, annihilating the enemy Cluster in one of their most impressive acts in decades.[80] Though both the Kuritans and their mercenary allies had all taken heavy losses, they successfully repulsed the invaders in a stunning victory.[79]
Jaime Wolf quickly worked to rebuild the Dragoons from their losses, incorporating sibko cadets, war orphan trainees who had come of age and captured Clan bondsmen taken on Luthien, as well as the "original" Dragoons. For equipment, salvage from the fighting on Luthien and the production lines of Blackwell Corporation provided the Dragoons with a wealth of Clan tech equipment, even including Clan OmniMechs.[81]
Wolf Pack[edit]
Tensions on Outreach between the disparate factions within the Dragoons broke into open hostility when Elson Novacat, a bondsman Elementals officer, and Alpin Wolf, Colonel Wolf's grandson, led a coup against him, an event later known as Elson's Challenge.[82] When the conflict began on Outreach, Delta Regiment and Zeta Battalion were on an assignment together, both engaged with enemy forces.[83] Zeta would break contract to return to Outreach on the side of Elson and Alpin, but Colonel Paxon decided to honor his contractual obligations, knowing that preserving the Dragoon reputation must take precedence. As a result, Delta would avoid the firestorm most of the other Dragoon units faced.[83] In the conflict's aftermath and through the new rebuilding and reorganization process under General Maeve Wolf, the Dragoons emerged stronger than ever before despite their losses.[82] Delta Regiment was reorganized with an attached Elemental battalion (three Stars and a command Point) and an aerospace fighter company.[84]
Under this new philosophy, Major Shelly Brubaker would successfully challenge Colonel Paxon to a Trial of Position for the right to command Delta Regiment.[72][85] Not long thereafter, Delta and Beta Regiments supported the relocation of Trellshire Heavy Industries away from the Jade Falcon Occupation Zone border.[86]
The Coventry Campaign[edit]
In early 3058, Clan Jade Falcon, in order to help build experience for their younger warriors after the Refusal War, began a major campaign into the Lyran Alliance. The LAAF forces were easily brushed aside on every world the Falcons struck as the Clan cut deep into the Alliance. Tormano Liao and Nondi Steiner, top aides to Archon Katherine Steiner-Davion, quickly deduced that the Falcons' ultimate target was Coventry, an important province capital and critical industrial world. Realizing they did not have sufficient forces on hand to defend Coventry, they hired mercenaries to turn the tide. From Wolf's Dragoons, Delta and Gamma Regiments were hired, along with the 71st Light Horse Regiment of the elite Eridani Light Horse, they would serve as the vanguard of the relief force. In support were the Waco Rangers and the attached Crazy Eights mercenary company. The taskforce would be named the Coventry Expeditionary Force (CEF).[87][88][89] Although Gamma Regiment was considered active at the time, their commander, Colonel Irwin Tyrell, was concerned his recently re-formed regiment were not ready for independent operations. Instead, individual units of the Gammas were assigned to reinforce Delta Regiment.[90] Overall command of the taskforce rested with Brubaker, a tribute as much to her personal skill and charisma as to the quality and quantity of the Dragoons' detachment.[85][90] The long history of animosity, however, between the Waco Rangers and the Dragoons repeatedly boiled over during preparations, as Colonel Wayne Rogers persisted in provoking Brubaker with petty insults. Only the presence of Brevet General Ariana Winston of the Light Horse kept matters civil.[91][92]
Arriving on Coventry on 5 April, Brubaker and her Dragoons were assigned to destroy the spaceport at Port St. William, which the Falcons intended to use to quickly land more troops. As Delta began its landing, Brubaker, in a bold maneuver, sent a batchall to the Jade Falcons, announcing her intentions to destroy the spaceport with only her First battalion. Star Colonel Creed Mattlov of the 12th Falcon Regulars accepted this challenge. The Falcons allowed Brubaker and her troops to land, and Brubaker soon attacked with First Battalion. The Dragoons quickly destroyed the Falcon pickets, and for fifteen minutes inflicted heavy damage on the spaceport's equipment and supplies before the Falcons responded. For twenty minutes, the two sides engaged in the most brutal fighting of the campaign, the Dragoons and Falcons clashed.[93][94][95] Facing heavy losses and troubled by a young Fire Falcon pilot who was inflicting disproportionate damage on her Nightstar,[96] Colonel Brubaker was forced to break her bid by calling in reinforcements, allowing Mattlov to do the same. The Dragoons eventually withdrew, having successfully inflicted enough damage on the spaceport to render it unusable to the Falcons, with First Battalion taking serious losses in the fighting. For his own part, Mattlov also claimed victory, as Brubaker had been the one to break her bid.[93][94][95] During the campaign, a number of former Jade Falcons who had been taken prisoner were hurriedly incorporated into Delta Regiment as bondsmen.[97]
The Expeditionary Force then linked up with the remnants of the 10th Skye Rangers, the Coventry militia and the Coventry Military Academy training cadre.[98] Brubaker was impressed with Hauptmann Caradoc Trevena, who was by that time the Tenth Rangers' First Battalion acting commanding officer and had effectively conducted the guerrilla war against the Falcons. Colonels Brubaker and Tyrell defended Trevena when Rogers dismissed him as a mere "recon company commander". Brubaker shortly thereafter begin a relationship with Trevena.[citation needed] The Lyran and mercenary forces soon agreed on a plan to launch a three-pronged attack against the Falcons at Port St. William on 12 April. The Dragoons and Eridani Light Horse would attack directly, allowing their other forces to attack from the flanks. The Falcons were able to discern the strategy, however, and ambushed the Waco Rangers' column. Brubaker and Delta Regiment were forced to abandon their attack to launch a rescue operation, though not before the Rangers lost 85 percent of their 'Mechs and Colonel Rogers was captured.[87][99][100][101] With the heavy losses, the CEF was forced to abandon their assault, falling back to Lietnerton. Just three days later on 15 April, elements of Delta successfully blunted a Jade Falcon advance on the defenders' position in the hilly region known as the Dales.[102]
For the next several weeks, the Falcons would lay siege to Lietnerton, launching probing attacks against the defenders, who at this point were running low on supplies and badly outnumbered. On 8 May, the Falcons launched an all-out attack, which was only narrowly pushed back, inflicting more losses on the beleaguered defenders. Another assault on the ninth — this time focused on the Light Horsemen — was only foiled when Light Horse artillery provided far more accurate fire support than their Clan counterparts.[103] On 10 May, the Expeditionary Force attempted to break the siege by launching a major bombing operation against the Falcons opposite the Dragoons' position at the center of the defenders' line, using aerospace assets from the Dragoons, the Eridani Light Horse and the surviving Tenth Skye Rangers. Delta Regiment's ground forces would then advance on the Falcons and drive them back. Unfortunately, an unexpected storm front moved in just as the fighters got off the ground, hampering the entire operation. As they began their strikes against the Falcons' defensive position, they were be spotted by patrolling Falcon OmniFighters. The Falcon Air Patrol's engagement with the Dragoons' fighters roused both sides' fighter assets to join the fight with little preparation. Both sides committed virtually all their fighter assets, and instead of a bombing run the CEF was forced into a massive dogfight. Although both sides took heavy losses in the engagement, the defenders were unable to complete their bombing runs, and Lietnerton remained under siege.[104][105]
On 30 May, acting on the advice of Hauptmann Trevena, the CEF sent a small strike force through underground mining tunnels to the town of Whitting, where the Falcons had based their rear command. Brubaker was in command with the remains of Delta Regiment and Trevena's recon company. The operation was a resounding success as the CEF captured a wealth of information on the Falcons' plans, as well as several prisoners including Star Colonel Arimas Malthus.[106] The raid on Whitting would become known as the last major engagement of the Coventry campaign.
The defenders were preparing to split up into small guerrilla bands when relief finally came in the form of an unprecedented multinational taskforce commanded by Prince Victor Steiner-Davion and Precentor Martial Anastasius Focht. On the advice of Clan Wolf-in-Exile warrior Ragnar, Prince Victor and the Coalition requested and were granted safcon to land and link up with the CEF. Rather than forcing a clash that would utterly devastate both Clan and Inner Sphere forces, Victor shrewdly offered Khan Marthe Pryde the right of hegira, an honorable withdrawal under Clan law. Pryde, faced with the prospect of attacks by Clan Wolf on the other side of her occupation zone, accepted. All prisoners were exchanged, and the long campaign was finally concluded.[107][108]
Rebuilding[edit]
After the fighting on Coventry, Delta Regiment once again returned to Outreach to rest and rebuild.[72] During this extended period, Delta expanded to brigade size by drawing troops previously serving with the Home Guard, with a reinforced regiment of armor (the 75th Dragoons Heavy Armor regiment), a full regiment of aerospace fighters (known as Reddings' Air Rangers), and a reinforced infantry regiment (Winter's Storm Wolves) that included Elementals, mechanized and jump infantry. With armor units permanently assigned to it for the first time in decades, Delta would be able to employ cavalry tactics against an enemy, with a flexibility rivalling that of the AFFC's Regimental Combat Teams.[1] They remained on Outreach for several years until accepting a contract with the Draconis Combine to help defend their border against Clan Ghost Bear,[1] garrisoning the world of Kiesen. By this time, 100 percent of the unit's 'Mech assets were considered upgraded with Clan technology, with OmniMechs comprising 54 percent of those machines.[109]
Jihad[edit]

On October 15, 3067, rogue mercenaries led by Colonel Wayne Waco launched a surprise attack on Harlech City on Outreach at the beginning of the Jihad. During the fighting, Epsilon Regiment and the Home Guard ground forces were effectively destroyed, while Zeta Battalion, the Wolf Spider Battalion and Beta Regiment all took heavy damage before eliminating the rogue mercenaries. Jaime Wolf himself was killed while slaying Wayne Waco. Wolfnet intelligence soon concluded the attacks had been sponsored by the Word of Blake in response to Dragoon opposition to the Word in the Chaos March.[110][111] General Maeve Wolf and Alpha Brigade immediately activated their contract termination with the Combine while Delta, true to their history, remained in the Combine.[112] Delta Regiment missed the further horrors on Outreach, as the devastated Dragoons retreated to Arc-Royal.[113]
The Jihad had a terrible impact on the reputations of mercenaries throughout the Inner Sphere, and by January 3068, Delta Regiment was facing public protests from the civilian population on Kiesen.[114] Delta was still based on Kiesen as of October, 3068.[115]
In early 3070, Delta was reassigned to Buckminster by the DCMS command. A Word of Blake taskforce soon attacked, consisting of the Blakists' 28th Division and 45th Shadow Divisions, along with two supporting WarShips. The WDWS Mars, a Vincent-class WarShip supporting Delta Regiment and the last Dragoon capital ship in existence, sacrificed itself to destroy both enemy WarShips, but this allowed the Blakist divisions to land. The sworn enemies engaged each other in an absolutely vicious battle with the Deltas successful in driving off their enemies, destroying more than two-thirds of their attackers and killing the Forty-fifth's commander. Precentor XI Dave Baughman, commander of the Twenty-eighth, took command of the situation, skillfully coordinating a fighting retreat to preserve the remains of his forces.[116] The Gray Wolves themselves were effectively shattered as a unit. The surviving Deltas were forced to join their fellow Dragoons on Arc-Royal, and were effectively disbanded as a command.[117][118][119][120] Unsubstantiated reports later indicated that the entire incident on Buckminster was manipulated by the Kokuryu-kai, and that ISF Director Shakir Jerrar and Gunji-no-Kanrei Kiyomori Minamoto arranged it in revenge for past transgressions by the Dragoons against the Combine.[121]
ilClan Era and Rebirth[edit]
During the Dark Age Era, Dragoons leader General Thomas Brubaker considered resurrecting Delta but never had the chance. Ironically, Delta, like Epsilon Regiment, was resurrected when the Dragoons had been almost destroyed – after the ilClan Trial, the new Dragoons leader, Colonel Henry Kincaid, formed the bones of two battalions of Epsilon and Charlie Battalion of Delta Regiment at the Dragoons' secret base on Ilion. By 30 April 3152, the new battalions were in training.[122]
Officers[edit]
| Rank | Name | Command | |
|---|---|---|---|
| Commanding Officers of Delta Regiment | |||
| Colonel | Travis King | 3005 - 3008[123] | |
| Colonel | Sarah Weisz | 3008 - 3020[9][124] | |
| Colonel | Kathleen Dumont | 3020 - 3038[34][125] | |
| Colonel | Bill Paxon | 3038 - 3054[1][72][85] | |
| Colonel | Shelly Brubaker | 3054 - 3070[72][85][126][127][128] | |
Other Officers[edit]
- When Bill Paxon lost his position as commanding officer of the unit in 3054, he was able to regain the position of unit's second-in-command.
- Under Brubaker's command, Delta's armor contingent, the 75th Dragoons Heavy Armor Regiment, was commanded by Lieutenant Colonel Stephen Rockwell.[129]
Tactics[edit]
Delta Regiment's tactics varied somewhat over the course of their history, largely due to change in commanders and equipment. Under the conservative Colonel King, Delta engaged in methodical, by-the-book operations, employing artillery, armor, infantry, commando and aerospace elements in virtually every operation.[123] Under Sarah "The Ghost" Weisz, Delta engaged in brilliant and innovative strategies, keeping their enemies constantly off balance with hit-and-run tactics.[124] Although her tenure as commander got off to a rough start, Kathleen Dumont's troops developed into a first-rate unit, with each battalion developing a distinct identity. Able Battalion, called the Landsknechts, was a heavy unit made up of consummate professionals and combat veterans who unfailingly held the line and took advantage of enemy mistakes.[43] Baker Battalion, known as the Specters, continued to embody the tactics Colonel Weisz had been so successful with, using mobility and deception to confuse enemy commanders. They maintained their standard of excellence even during the disastrous Dromini VI campaign, where their constant formation changes once led one opposing commander to misidentify them as an entire regiment. This approach served them well until the cataclysmic fighting on Misery, where pitched fighting led to the destruction of most of the battalion.[130] Of the three, only Charlie Battalion failed to live up to the Dragoons' high standards. This was blamed primarily on the drinking problems of the unit's commander, and led to numerous embarrassing mishaps on the battlefield, including being surrounded on Proserpina. Due to their shortcomings, they were largely held in reserve on Misery, resulting in relatively low casualties but severely damaging unit morale and leading to the retirement of several officers. It is to the credit of the troops of the unit that most performed superbly on Wapakoneta and Crossing.[59][131][132]
Under Colonel Brubaker nearly thirty years later, the respective battalion roles bore a strong resemblance to their pre–Fourth Succession War descriptions, with Able Battalion once again known as the Landsknechts, a hard-hitting force. Baker Battalion continued to favor speed and mobility ahead of sheer firepower, now known as Vecinni's Vanguards. Charlie Battalion continued to go without a nickname and retained their Corinthian helmet insignia, though they had long since ceased to be the regiment's "weak link".[127] Charlie Battalion would finally take a unit nickname: "Phalanx", some years after the Coventry campaign, specializing in defensive formations.[128] Brubaker preferred to have her commands attack in waves, with her BattleMechs engaging in the thickest combat, only to pull back and allow a strafing run by her aerospace assets. When the enemy attempted to concentrate on the threat from above, her Elemental assets would attack from below, followed by yet another advance by the 'Mechs.[133] In the aftermath of the "Wolf Pack" reforms, Delta dispensed with the attached armored battalion employed by the other line regiments, instead incorporating a permanently attached aerospace wing.[134] Brubaker's command company particularly excelled at close range engagements, though the colonel herself would hang back as a "sniper" in her Clan-equipped Nightstar.[135] After the Coventry campaign, Delta was expanded to a full brigade with full regiments of armor, aerospace fighter, and infantry. This allowed them to begin engaging in cavalry tactics, using armor units to harass the enemy's flanks while the heavier 'Mechs attack from the front.[136] A reinforced mixed infantry regiment allowed further flexibility in attacks from below, while the full regiment of aerospace fighters—formed along the same structure as a BattleMech regiment—proved a devastating edge.[128]
Composition History[edit]
3025[edit]
Delta Regiment (Regiment/Elite/Reliable)[137]
3028[edit]
Delta Regiment (3 Battalions)[125]
- CO: Colonel Kathleen Dumont
- Aide : Lieutenant Terrence Blake
- Command Company ("Dumont's Dragoons", mixed)
- Able Battalion ("The Landsknechts")
- CO: Major Benjamin Schwartzkopf
- Baker Battalion ("The Specters")
- CO: Major Diane Specter
- Charlie Battalion
- CO: Major Neil Parella
- Support: Fortress-class DropShip Loch Lomond[138]
In addition to their BattleMech forces, Delta Regiment included several attached aerospace, Infantry and Armor units, usually integrated at the company level. These included two aerospace fighter lances, three infantry platoons, three armored vehicle platoons (each composed of six machines), and two artillery platoons, both attached to the regimental command company. After the fighting on Misery, Delta was reorganized into five provisional companies. Much of the aerospace and conventional forces were transferred to the Home Guard to help protect the Dragoon dependents, but some did see fighting on Wapakoneta and Crossing.[125]
3040[edit]
Delta Provisional (Regiment/Regular/Fanatical)[139]
3050[edit]
Delta Regiment (Regiment/Elite/Reliable)[140]
3055[edit]
Delta Regiment (Strengthened Regiment)[126]
- CO: Colonel Shelly Brubaker
- 1st BattleMech Battalion
- (1 Command Lance, 3 BattleMech Companies)
- 2nd BattleMech Battalion
- (1 Command Lance, 3 BattleMech Companies)
- 3rd BattleMech Battalion
- (1 Command Lance, 3 BattleMech Companies)
- Elemental Battalion
- (1 Command Elemental Point, 3 Elemental Stars)
- Delta Aerospace Company
- (3 Wings of 4 Aerospace fighters each)
- Support Vessels
- Overlord-class DropShips - Bayard, Juan Carlos, Konga, Los Diablos, Thermopylae Redux, and Utah Beach; Scout-class DropShips - Lone Ranger, and Strider; Lion-class DropShips - Croyd and Simba; Seeker-class DropShips - Sudentenland
3059[edit]
Delta Regiment (Regiment/Elite/Reliable)[127]
- CO/Command Company: Colonel Shelly Brubaker
- Aide: Lieutenant Colonel Bill Paxon
- Delta Command Company
- (1 BattleMech Lance, 2 BattleMech Stars, 1 Aerospace Point, 1 Elemental Point, Recon Lance (5 combat vehicles and 1 BattleMech)
- Able Battalion (The Landsknechts) (1 Command Lance, 3 BattleMech Companies)
- CO: Major Phillipe
- Baker Battalion (Vencinni's Vanguards) (1 Command Lance, 3 BattleMech Companies)
- CO: Major Trisha Vencinni
- Charlie Battalion (1 Command Lance, 3 BattleMech Companies)
- CO: Major Paul Jacobs
- Eagle Battalion (Delta Elemental Support) (Reinforced Elemental Battalion/Veteran/Reliable) (1 Command Elemental Point and 3 Elemental Stars)
- CO: Major Elias Winters
- Foxtrot Battalion (Delta Aerospace Wing) (2 Companies/Veteran/Reliable) (24 fighters organized into lances of 4 fighters each and 3 lances to a company)
3067[edit]
Delta Regiment (Regiment/Elite/Reliable)[1]
- CO/Command Company: Colonel Shelly Brubaker
- Aide: Lieutenant Colonel Bill Paxon
- Delta Command Company
- (1 BattleMech Lance, 2 BattleMech Stars, 1 Aerospace Point, 1 Elemental Point, Recon Lance (5 combat vehicles and 1 BattleMech))
- Able Battalion (The Landsknechts) (1 Command Lance, 3 BattleMech Companies)
- CO: Major Jerry Meander
- Baker Battalion (Vencinni's Vanguards) (1 Command Lance, 3 BattleMech Companies)
- CO: Major Trisha Vencinni
- Charlie Battalion (Phanlax) (1 Command Lance, 3 BattleMech Companies)
- CO: Major Paul Jacobs
- 75th Dragoons Heavy Armor (Reinforced Armor Regiment/Regular/Reliable) (4 Battalions)
- CO: Lieutenant Colonel Stephen Rockwell
- Infantry Regiment (Winter's Storm Wolves) (Reinforced Regiment/Veteran/Reliable) (Mix of battle armor, jump and mechanized infantry)
- CO: Major Elias Winters
- Aerospace Regiment (Reddings' Air Rangers) (Regiment/Veteran/Reliable) (108 fighters organized into lances of 4 fighters each, 3 lances to a company, etc.)
- CO: Lieutenant Colonel Joshua Reddings
- Note: At this point in time the unit was stationed on Kiesen.[142]
Insignia and Color Scheme[edit]
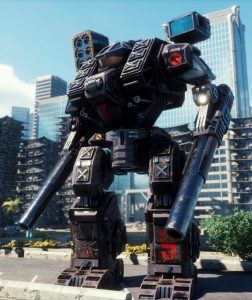
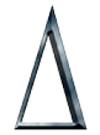
The machines of Delta Regiment employ a dusty gray paint scheme with the Greek letter D as an insignia. Delta's 'Mechs bear the Dragoons' wolf's head on their upper right torsos and left hips, followed by Delta's insignia, then the insignias of their battalion and company. Elementals are painted in gray, white and black camouflage with wolf's head masks with gray eyes.[72] Delta personnel, when off-duty, could be seen wearing ball caps with the red delta D.[97]
Notes[edit]
- There is a major discrepancy in when Kathleen Dumont's time as commander of Delta Regiment ended. According to the Luthien scenario pack and The Battle of Coventry scenario pack, she remained in command through the Clan Invasion and retired in 3054, after which she was directly succeeded by Shelly Brubaker.[143][144] However, the novel Wolf Pack, Field Manual: Mercenaries and Operational Turning Points: Falcon Incursion all clearly indicate that Bill Paxon commanded Delta during the Dragoon Civil War, having succeeded Dumont and commanding Delta just prior to Brubaker, with Brubaker taking command after a successful challenge. Further, Field Manual: Mercenaries indicates that Paxon served as Brevet Colonel during the retreat from Murchison, strongly implying that Dumont may have been killed during that battle.[72][85][145] As the Field Manual and Operational Turning Points series take precedence by the policies of this wiki, their accounting is treated as canon in this article.
- The operation to relocate Trellshire Industries in 3055[86] is not supported by other publications.
Game Notes[edit]
3028[edit]
Historical Turning Points: Misery grants Delta Regiment a +2 initiative bonus to any scenario where they are the attacker.[146] Operational Turning Points: Death to Mercenaries, based during the Fourth Succession War, modifies this to give Delta a +2 bonus to all skill level roll results.[147]
3057 to 3067[edit]
Delta Regiment receives a +2 initiative bonus from the fourth turn and onward in any scenario where they employ a combination of BattleMechs, air support (including VTOLs) and infantry assets. In addition, beginning in turn four, any initiative bonus by their opponent is negated. Finally, Delta's command company, specializing in short-range attacks, receives a -1 to-hit modifier for any weapon attack made within six hexes.[148][149] Like all Dragoon units, when using the Random Mapsheet Tables, the Dragoons player may increase or decrease their roll by up to two, and may alter an opponent's roll by one. They may also ignore the +1 to-hit modifier for firing at multiple targets, and may not be intimidated unless three-quarters of their starting force is destroyed. When using Random 'Mech Assignment Table rules, the Dragoons player may add +1 to their roll. If this puts their roll at 13, the Dragoons player may choose any Inner Sphere or Clan 'Mech from that weight class.[150][151][152]
References[edit]
- ↑ 1.0 1.1 1.2 1.3 1.4 1.5 1.6 Field Manual: Mercenaries, Revised, p. 117: "Delta Regiment: Gray Wolves"
- ↑ Wolf's Dragoons, p. 7: "First Assignment"
- ↑ Wolf's Dragoons, pp. 7–8: "Assault on Halloran"
- ↑ Wolf's Dragoons, p. 8: "A Clever Trap"
- ↑ Wolf's Dragoons, p. 10: "Attack on New Valencia"
- ↑ Wolf's Dragoons, p. 11: "String of Victories"
- ↑ Wolf's Dragoons, pp. 11–12: "Battle of New Aragon"
- ↑ Wolf's Dragoons, p. 13: "Death of Colonel King"
- ↑ 9.0 9.1 9.2 Wolf's Dragoons, p. 13: "Departure", Weisz is promoted back on New Valencia
- ↑ Wolf's Dragoons, p. 14: "Departure", the Dragoons leave from January through November
- ↑ Wolf's Dragoons, p. 15: "Against the Eagle", the battles of Wallacia and Scarborough
- ↑ Wolf's Dragoons, pp. 15–16: "The Eagle Fails", the battle of Shiro III
- ↑ Mercenary's Handbook 3055, p. 28: "Second Contract: Liao", Dragoons garrison Carver
- ↑ Wolf's Dragoons, p. 17: "Pact with Anton Marik"
- ↑ Historical: Brush Wars, p. 35: "Deployment Tables: Rebels (April - July 3014)" Delta Regiment on New Delos
- ↑ 16.0 16.1 16.2 16.3 16.4 Historical: Brush Wars, p. 37: "Deployment Tables: Rebels (August - December 3014)"
- ↑ Historical: Brush Wars, p. 23: "Sophie's World", Delta Regiment fights on Sophie's World
- ↑ Wolf's Dragoons, p. 19: "Last Gasp", fighting on Sophie's World comes to a close
- ↑ Historical: Brush Wars, p. 24: "Sophie's World", fighting on Sophie's World comes to a close
- ↑ Historical: Brush Wars, p. 27: "Other Actions", Delta Regiment takes Kyeinnisan
- ↑ 21.0 21.1 Historical: Brush Wars, p. 31: "Other Actions", Delta fights on Emris IV
- ↑ 22.0 22.1 Historical: Brush Wars, p. 39: "Deployment Tables: Rebels (January - May 3015)", Delta and other Dragoon units take light casualties
- ↑ Wolf's Dragoons, pp. 19–20: "Betrayal", Anton Marik arrests Joshua Wolf
- ↑ 24.0 24.1 Historical: Brush Wars, pp. 31–32: "Final Mistake", Anton Marik arrests Joshua Wolf
- ↑ Wolf's Dragoons, pp. 19–20: "Betrayal", the Battle of New Delos
- ↑ Wolf's Dragoons, p. 21: "Hide and Seek", Beta Regiment loses a battalion to a DropShip accident
- ↑ Wolf's Dragoons, pp. 22–23: "A Daring Plan", the Dragoons plan to assault
- ↑ Wolf's Dragoons, p. 23: "Icebox", a traitor in the Marik court
- ↑ Wolf's Dragoons, p. 24: "Blood and Iron", the Dragoons hit Hesperus
- ↑ 30.0 30.1 30.2 Hector (short story)
- ↑ Wolf's Dragoons, pp. 24–25: "River of Swords", Kerensky finds an opening
- ↑ Wolf's Dragoons, p. 25: "Widow's Crossing", the Dragoons push into the pass
- ↑ Wolf's Dragoons, p. 25: "On the Verge of Victory", the Dragoons are pushed back and forced to retreat
- ↑ 34.0 34.1 Wolf's Dragoons, p. 27: "In Service to Steiner", The Dragoons sign with House Steiner, Weisz retires
- ↑ Wolf's Dragoons, p. 27: "Battle for Dromini", Delta Regiment takes heavy losses at Draschau
- ↑ Wolf's Dragoons, p. 29: "Enter the Dragon", The Dragoons assault Quentin
- ↑ 37.0 37.1 Wolf's Dragoons, p. 31: "Success on Quentin", The Dragoons prepare their plan
- ↑ Wolves on the Border, p. 39: The Dragoons land on planet
- ↑ Wolves on the Border, p. 32: Jaime Wolf introduces his officers
- ↑ Wolves on the Border, p. 43: Officers departed
- ↑ Wolves on the Border, p. 45: Snake Stompers identified
- ↑ 42.0 42.1 Wolves on the Border, pp. 71–72: Snake Stompers identified
- ↑ 43.0 43.1 Wolf's Dragoons, p. 69: "Delta Regiment: Able Battalion", the Landsknechts are described in detail
- ↑ Wolf's Dragoons, p. 69: "Delta Regiment"
- ↑ House Kurita (The Draconis Combine), p. 135: "Mech Unit Deployment Table: Galedon Military District", Delta's assigned homeworld
- ↑ Wolf's Dragoons, p. 74: "Delta Regiment Personalities: Captain Gerald LaSalle", fought on Bergman's Planet
- ↑ Wolf's Dragoons, p. 74: "Delta Regiment Personalities: Captain Justin Holbrook", fought on Udibi
- ↑ Wolf's Dragoons, p. 74: "Delta Regiment Personalities: Captain Gustav Dietrick", fought on Proserpina
- ↑ Wolf's Dragoons, p. 36: "The Wolf Alone", Samsonov attempts to remove Dumont from command
- ↑ Wolves on the Border, p. 213: Samsonov's demands
- ↑ Wolf's Dragoons, pp. 36–37: "Atrocity", the fighting on An Ting leads to the battle of Misery
- ↑ Wolf's Dragoons, pp. 36–37: "Atrocity", the Combine assembles troops to meet the Dragoons' challenge
- ↑ Wolves on the Border, p. 294: Tetsuhara repeats their orders
- ↑ 54.0 54.1 Wolf's Dragoons, pp. 37–38: "Misery", recounting the battle of Misery
- ↑ Wolf's Dragoons, p. 69: "Delta Regiment: Able Battalion", The Landsknechts performance on Misery
- ↑ 56.0 56.1 Historical Turning Points: Misery, p. 14: "Bloody Honor", Aftermath
- ↑ Historical Turning Points: Misery, p. 14: "Bloody Honor", Defender, 150 percent of attacker's strength
- ↑ Wolf's Dragoons, p. 69: "Delta Regiment: Baker Battalion", Few of The Specters survive
- ↑ 59.0 59.1 Wolf's Dragoons, p. 69: "Delta Regiment: Charlie Battalion", Charlie Battalion held in reserve
- ↑ Wolf's Dragoons, pp. 71–72: "Delta Regiment Unit Roster: Charlie Battalion", Captains Fletcher Considine, James MacGregor, Morgan Summers all leave active command
- ↑ Wolf's Dragoons, pp. 70–72: Delta Regiment Unit Roster
- ↑ 62.0 62.1 62.2 62.3 Wolf's Dragoons, pp. 41–42: "Wapakoneta"
- ↑ 63.0 63.1 63.2 63.3 NAIS The Fourth Succession War Military Atlas Volume 1, pp. 69–71: "Wapakoneta"
- ↑ Wolf's Dragoons, p. 74: "Delta Regiment Personalities: Captain Ralph Kincaid", Kincaid's death
- ↑ NAIS The Fourth Succession War Military Atlas Volume 1, p. 70: "Wapakoneta", The Battle of Black Statues
- ↑ Starterbook: Wolf and Blake, p. 21: "Jacob Kincaid: MechWarrior Profile", Jacob is the first to bear the Kincaid Honorname
- ↑ 67.0 67.1 NAIS The Fourth Succession War Military Atlas Volume 2, pp. 7–9: "Wapakoneta", The Battle of Wapakoneta
- ↑ 68.0 68.1 Wolf's Dragoons, pp. 42–43: "Crossing", the Battle of Crossing
- ↑ 69.0 69.1 NAIS The Fourth Succession War Military Atlas Volume 2, pp. 30–37: "Crossing", the Battle of Crossing
- ↑ BattlePack: Fourth Succession War, p. 31: "Scenario 9: At the Gates of Hell", Attacker and Defender
- ↑ Wolf's Dragoons, p. 70: "Delta Regiment Unit Roster: Command Company", Dumont's 'Mech destroyed
- ↑ 72.0 72.1 72.2 72.3 72.4 72.5 72.6 72.7 Field Manual: Mercenaries, p. 101: "Delta Regiment: Trials and Tribulations"
- ↑ 73.0 73.1 73.2 73.3 Historical: War of 3039, p. 141: "Deployment Table: Allied Mercenary Forces", Delta Regiment listed as a Provisional unit with a Regular experience rating, the heavy losses on Caph
- ↑ 74.0 74.1 74.2 Historical: War of 3039, p. 61: "Healing the Rift", the Dragoon task force strength stood at approximately ten battalions
- ↑ 75.0 75.1 Historical: War of 3039, pp. 61, 63: "Caph", the battle of Caph
- ↑ Jihad Secrets: The Blake Documents, p. 73: "Stacy Church", Church adopted on Caph by Delta's infantry
- ↑ Historical: War of 3039, p. 120: "Hsien", the Third Free Worlds Guards retreat before the Dragoons arrive
- ↑ Luthien, p. 26: "Draconis Combine Mustered Soldiery: Wolf's Dragoons: Delta Regiment", Delta Regiment listed
- ↑ 79.0 79.1 Mercenary's Handbook 3055, p. 35: "Eighth Contract: Federated Commonwealth", the Dragoons fight on Luthien
- ↑ Invading Clans, p. 61: "Luthien", Delta corners and destroys the 145th
- ↑ Mercenary's Handbook 3055, pp. 35–36: "Open Contracts". Wolf rebuilds the Dragoons once again
- ↑ 82.0 82.1 Mercenary's Handbook 3055, pp. 36–37: "Crucible", Dragoon Civil War
- ↑ 83.0 83.1 Wolf Pack, pp. 296–297: Delta Regiment and Zeta Battalion are engaged
- ↑ Mercenary's Handbook 3055, p. 43: "Delta Regiment"
- ↑ 85.0 85.1 85.2 85.3 85.4 Operational Turning Points: Falcon Incursion, p. 9: "Personalities: Shelly Brubaker"
- ↑ 86.0 86.1 Mercenary's Handbook 3055, p. 39: "Table of Organization and Equipment", Beta and Delta assist with the relocation of Trellshire
- ↑ 87.0 87.1 Operational Turning Points: Falcon Incursion, p. 8: "The Falcon's Incursion", background
- ↑ The Battle of Coventry, p. 6: "Learning to Fly", the CEF is deployed but is ultimately unsuccessful
- ↑ Malicious Intent, p. ?[citation needed]
- ↑ 90.0 90.1 Operational Turning Points: Falcon Incursion, p. 11: "Combatants: Wolf's Dragoons Delta Regiment", Gamma Regiment attached to Delta Regiment
- ↑ Malicious Intent, p. ??: Wayne Rogers feuds with the Dragoons[citation needed]
- ↑ The Battle of Coventry, p. 33: "Scenario 9: Ground Zero", Rogers feuds with the Dragoons
- ↑ 93.0 93.1 The Battle of Coventry, p. 9: "Runaway", the battle of the spaceport
- ↑ 94.0 94.1 The Battle of Coventry, pp. 35–38: "Scenario 10: Runaway", the battle of the spaceport
- ↑ 95.0 95.1 Operational Turning Points: Falcon Incursion, pp. 25–26: "Touchpoint: Port St. William", the battle of the spaceport
- ↑ Technical Readout: 3058 Upgrade, p. 162: "Fire Falcon: Notable MechWarriors: Star Captain Avarah Roshak", Roshak nearly disables Brubaker's 'Mech
- ↑ 97.0 97.1 BattleTech: 25 Years of Art & Fiction, p. 63: "Thus It Shall Stand"
- ↑ The Battle of Coventry, pp. 9–10: "Probing the Defenses", the CEF regroups with the Lyran defenders
- ↑ The Battle of Coventry, p. 10: "Probing the Defenses", the Dragoons rescue the Waco Rangers
- ↑ The Battle of Coventry, pp. 41–43: "Scenario 12: Ambush!", the Waco Rangers are routed after ignoring intelligence intel
- ↑ The Battle of Coventry, pp. 47–48: "Scenario 14: The Wolf Bites Back", the Dragoons rescue the Waco Rangers
- ↑ BattleTech: 25 Years of Art & Fiction, p. 63: "Thus It Shall Stand", Baker Company fights in the Dales
- ↑ The Battle of Coventry, p. 10: "Siege and Relief", the Dragoons and their allies are put on the defensive
- ↑ The Battle of Coventry, p. 12: "Foiled by Fate", storm weather and the presence of Falcon OmniFighters foil the bombing operation
- ↑ The Battle of Coventry, pp. 55–56: "Stormy Skies", storm weather and the presence of Falcon OmniFighters foil the bombing operation
- ↑ The Battle of Coventry, pp. 10–11: "Whitting", Delta performs a successful strike on Whitting
- ↑ The Battle of Coventry, p. 13: "Endgame", Allies negotiate end to the campaign
- ↑ The Battle of Coventry, p. 13: "Aftermath", prisoners are exchanged and the campaign comes to an end
- ↑ Field Manual: Updates, p. 136: "Mercenary Deployment Roster: Draconis Combine, Wolf's Dragoons: Delta Regiment"
- ↑ Dawn of the Jihad, pp. 11–15: "Shadows of Faith - Chapter 1", the destruction in Harlech and the death of Jaime Wolf
- ↑ Dawn of the Jihad, pp. 30–31: "Death of a Legend", the destruction in Harlech and the death of Jaime Wolf
- ↑ Dawn of the Jihad, pp. 31–33: "Counterstrike: Dragoons Break Contract", Alpha Regiment leaves the Combine's service while Delta remains
- ↑ Dawn of the Jihad, p. 36: "Outreach: A Survivor's Account", recounting the retreat
- ↑ Dawn of the Jihad, p. 38: "Mercenaries Under Fire", mercenaries in the Combine facing scrutiny
- ↑ Jihad Hot Spots: 3070, p. 32: "AMC Status Advisory", Delta's Regiment's current location
- ↑ Technical Readout: 3050 Upgrade, p. 208: "Exterminator: Notable Pilots", Dave Baughman's actions on Buckminster
- ↑ Jihad Secrets: The Blake Documents, p. 100: "28th Division (Promise of Deliverance IV-xi)", 28th takes major damage fighting Delta Regiment
- ↑ Jihad Secrets: The Blake Documents, p. 105: "45th Shadow Division (Arioch's Avengers - exact composition unknown)", 45th loses commander while taking heavy losses
- ↑ Mercenaries Supplemental Update, p. 120: "Wolf's Dragoons", Delta Regiment destroys two-thirds of the Blakists but took horrendous casualties
- ↑ Starterbook: Wolf and Blake, p. 17: "A Time for Pain", Delta Regiment falls on Buckminster
- ↑ Jihad Hot Spots: 3070, p. 94: "Council of Gems, II", Ruby and Diamond discuss the shattering of Delta on Buckminster
- ↑ Redemption Rites, pp. 254–255
- ↑ 123.0 123.1 Wolf's Dragoons, p. 73: "Delta Regiment Personalities: Colonel Travis King"
- ↑ 124.0 124.1 Wolf's Dragoons, p. 73: "Delta Regiment Personalities: Sarah Weisz"
- ↑ 125.0 125.1 125.2 Wolf's Dragoons, pp. 70–72: "Delta Regiment Unit Roster", Delta Regiment's TO&E in detail
- ↑ 126.0 126.1 Mercenary's Handbook 3055, p. 43: "Delta Regiment", Delta Regiment's TO&E in detail
- ↑ 127.0 127.1 127.2 Field Manual: Mercenaries, p. 101: "Delta Regiment: Trials and Tribulations, Delta Regiment", all three 'Mech battalions described
- ↑ 128.0 128.1 128.2 Field Manual: Mercenaries, Revised, p. 117: "Delta Regiment: Gray Wolves", Delta Regiment's TO&E described, Charlie Battalion named
- ↑ Field Manual: Mercenaries, Revised, p. 117: "Delta Regiment: Gray Wolves, Officers"
- ↑ Wolf's Dragoons, p. 69: "Delta Regiment: Baker Battalion", the Specters are described in detail
- ↑ Wolf's Dragoons, p. 69: "Delta Regiment: Charlie Battalion", Charlie Battalion described in detail
- ↑ Wolf's Dragoons, p. 73: "Delta Regiment Personalities: Major Neil Parella", alcohol and morale problems, Charlie Battalion struggles
- ↑ Field Manual: Mercenaries, p. 101: "Delta Regiment: Trials and Tribulations, Tactics"
- ↑ Field Manual: Mercenaries, p. 101: "Delta Aerospace Wing"
- ↑ Field Manual: Mercenaries, p. 101: "Delta Command Company"
- ↑ Field Manual: Mercenaries, Revised, p. 117: "Delta Regiment: Gray Wolves, Tactics"
- ↑ 137.0 137.1 137.2 House Kurita (The Draconis Combine), p. 133: "DCMS Deployment Table"
- ↑ Wolf's Dragoons, p. 69
- ↑ 139.0 139.1 Historical: War of 3039, p. 141
- ↑ 140.0 140.1 20 Year Update, p. 19
- ↑ Field Manual: Mercenaries, p. 114
- ↑ Field Manual: Updates p. 183
- ↑ Luthien, p. 26: "Wolf's Dragoons Unit Roster", Kathleen Dumont named as Delta's commander
- ↑ The Battle of Coventry, p. 59: "Colonel Shelly Brubaker", Brubaker succeeds Dumont
- ↑ Wolf Pack, p. 301: Bill Paxon mentioned as commander of Delta Regiment
- ↑ Historical Turning Points: Misery, p. 8: "Wolf's Dragoons: Delta Regiment"
- ↑ Operational Turning Points: Death to Mercenaries, p. 13: "Wolf's Dragoons: Delta Regiment"
- ↑ Field Manual: Mercenaries, p. 130: "Rules: Wolf's Dragoons: Delta Regiment"
- ↑ Field Manual: Mercenaries, Revised, p. 136: "Rules: Wolf's Dragoons: Delta Regiment"
- ↑ Field Manual: Mercenaries, p. 130: "Rules: Wolf's Dragoons"
- ↑ Field Manual: Mercenaries, Revised, p. 136: "Rules: Wolf's Dragoons"
- ↑ Operational Turning Points: Falcon Incursion, p. 11: "Combatants: Wolf's Dragoons Delta Regiment", Delta Regiment Unit Abilities
Bibliography[edit]
- The Battle of Coventry
- BattlePack: Fourth Succession War
- BattleTech: 25 Years of Art & Fiction
- Dawn of the Jihad
- Field Manual: Mercenaries
- Field Manual: Mercenaries, Revised
- Field Manual: Updates
- Hector (short story)
- Historical Turning Points: Misery
- House Kurita (The Draconis Combine)
- Invading Clans
- Jihad Hot Spots: 3070
- Jihad Hot Spots: 3076
- Jihad Secrets: The Blake Documents
- Luthien
- Malicious Intent
- Mercenaries Supplemental Update
- Mercenary's Handbook 3055
- NAIS The Fourth Succession War Military Atlas Volume 1
- NAIS The Fourth Succession War Military Atlas Volume 2
- Operational Turning Points: Death to Mercenaries
- Operational Turning Points: Falcon Incursion
- Redemption Rites
- Starterbook: Wolf and Blake
- Technical Readout: 3050 Upgrade
- Technical Readout: 3058 Upgrade
- Wolf Pack
- Wolf's Dragoons
- Wolves on the Border
